How to Configure Published Resources for Monitoring?
To configure the applications / desktops that the simulator has to launch, click on the ![]() icon against Published Resources in Figure 1.
icon against Published Resources in Figure 1.
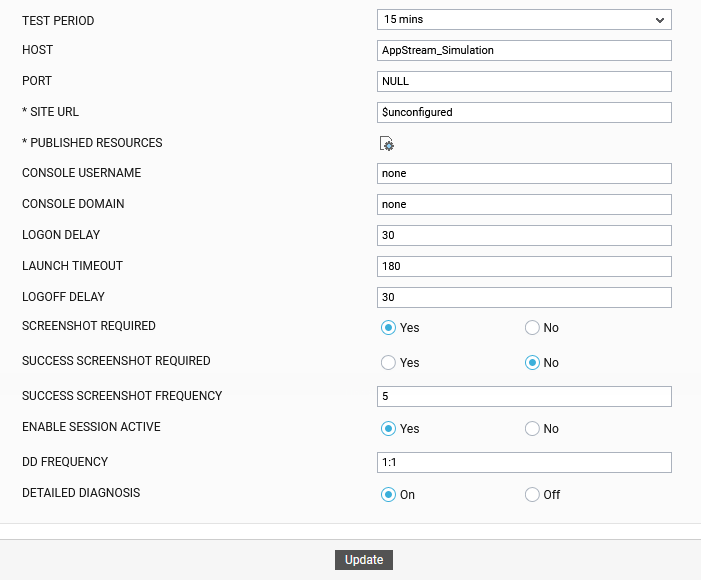
Figure 1 : The AWS AppStream Logon Simulator Test configuration page
Figure 2 will then appear.
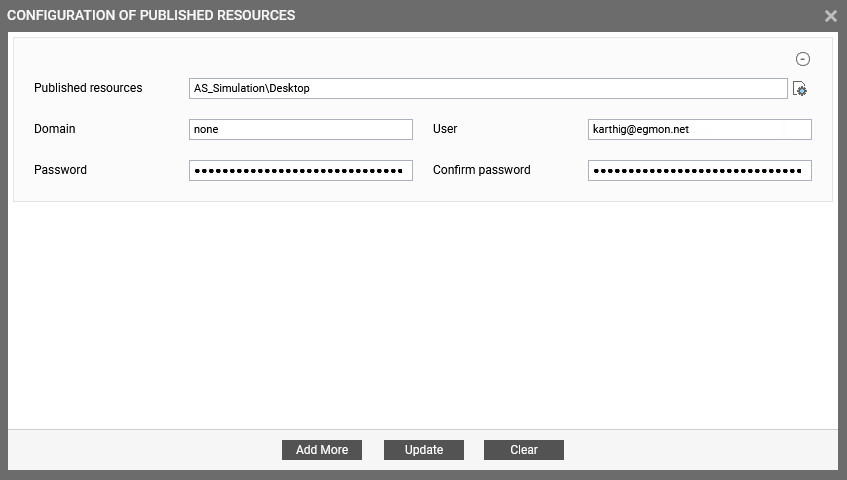
Figure 2 : Configuring the published resources to be launched
Using Figure 2, you can easily configure multiple resources that you want the simulator to launch and also the valid user credentials for accessing each resource. For this, follow the steps below:
-
Provide the name of a resource to be launched in the Published resources text box. The resource can be an application / desktop. When providing application / desktop names, make sure you provide the same name using which the applications / desktops are displayed in the AWS AppStream web console. Also, make sure you provide the same name using which the applications / desktops are displayed in the AWS AppStream Web Client. Also, ensure that the user you specify is authorized to launch all the applications / desktops configured in the Published resources. To provide a comma-separated list of Published resources, click on the
 icon against Published Resources in Figure 2. Figure 3 will then appear.
Note:
-
If you want to launch multiple resources, then, ensure that you configure each resource separately by clicking the Add More button.
-
The resources can be specified either in lower case or upper case or a combination of both.
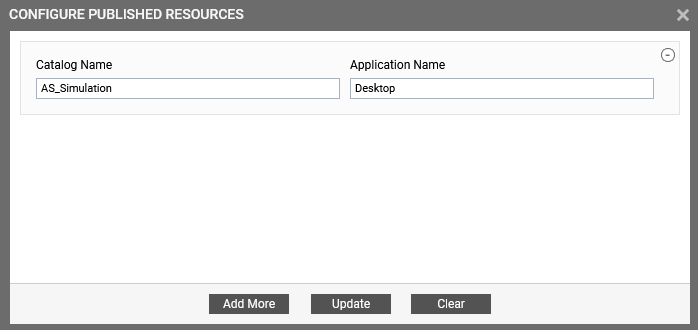
Figure 3 : Configuring the published resources
In Figure 3, specify the following:
-
Catalog Name: If the simulator is simulating accesses to Amazon AppStream via the AWS AppStream Web Client, then the Resources page of the console will list the catalogs that contain the resources (i.e., applications/desktops) that are available for access. The application/desktop that the simulator should launch may be in any of these catalogs. By default, this is set to none if you are launching a unique application/desktop from the Resources page. On the other hand, if the application / desktop to be launched is available in multiple catalogs of the Resources page, then you must specify the exact Catalog Name within which that application / desktop is present.
Note:
The Catalog Name is not case-sensitive.
-
Application Name: Specify the exact name of the Application/Desktop to be launched. When providing the application/desktop name, make sure you provide the same name using which that application/desktop is displayed in the AWS AppStream web console.
Note:
The Application Name is not case-sensitive.
Finally, click the Add More button in Figure 3 to add more applications / desktops to be launched. If you wish to clear the contents that you have specified in Figure 3, click the Clear button. If you do not want to add any more applications / desktops, click the Update button to save the changes and exit Figure 3. You will then return to Figure 2 where you can proceed to provide other details that are required for simulation.
-
- Then, using the Domain, User, Password, and Confirm Password parameters, configure the credentials of the user who is authorized to launch the configured resources.
- At any given point in time, you can exclude/delete a resource from the simulation by clicking the
 button corresponding to that resource in Figure 3.
 - You can also clear all the configured resources and their launch details at one shot, by clicking the Clear button in Figure 3.
