
Configuring Naming Rules for Kubernetes Nodes
In some container environments, Kubernetes nodes in a Kubernetes cluster for e.g., Tanzu cluster, may be configured with host names that exceed 32 characters. In addition, for easy identification, host names of all nodes in a single cluster may be configured with the same prefix. If discovery by agent is enabled in such environments, the Kubernetes nodes will be auto-discovered and auto-managed with the same nick name. As a result, when an alarm is raised on a particular node, administrators found it difficult to figure out which exact component is experiencing issues and why. To ease problem identification and resolution in such environments, administrators can use the KUBERNETES INFRASTRUCTURE – NAMING RULES page to create a naming rule for Kubernetes nodes with lengthy / similar host names.
To add a rule, administrators should specify the prefix of the host name and the corresponding unique name in this page. Whenever a Kubernetes node in a cluster with lengthy / similar host name is auto discovered, if a naming rule is configured, then, eG Enterprise uses the unique name specified in the rule as the nick name to auto manage that Kubernetes node.
To know how to configure the rules, do the following:
- Login to the eG admin interface.
- Follow the Infrastructure -> Discovery menu sequence.
-
Select the Naming Rules option under the Kubernetes Infrastructure sub-node in the Auto Scaling Environment sub-node of the Agent Discovery node in the discovery tree. The right panel will change to display a KUBERNETES INFRASTRUCTURE – NAMING RULES page (see Figure 1).
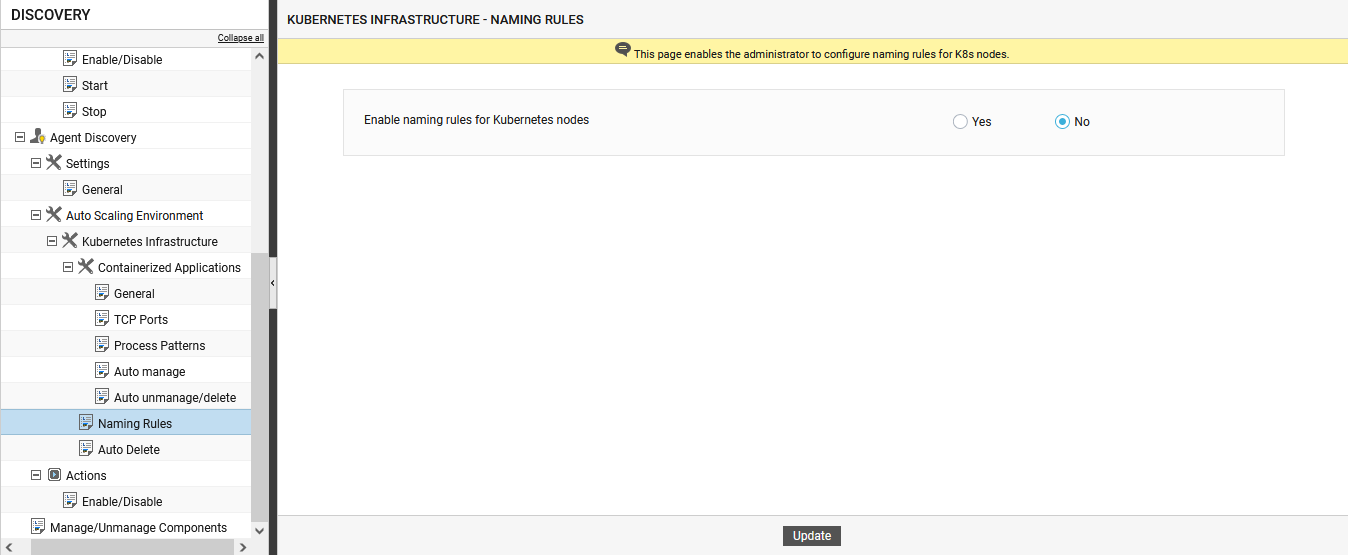
- To enable the eG manager to automatically manage the discovered Kubernetes nodes based on the naming rules, turn on the Enable naming rules for Kubernetes nodes flag to Yes.
-
Once you enabled the Enable naming rules for Kubernetes nodes flag, the Auto naming for Kubernetes node discovery section will appear below the flag as shown in Figure 2. Now, click on the Add rule button to add the naming rules for discovery.
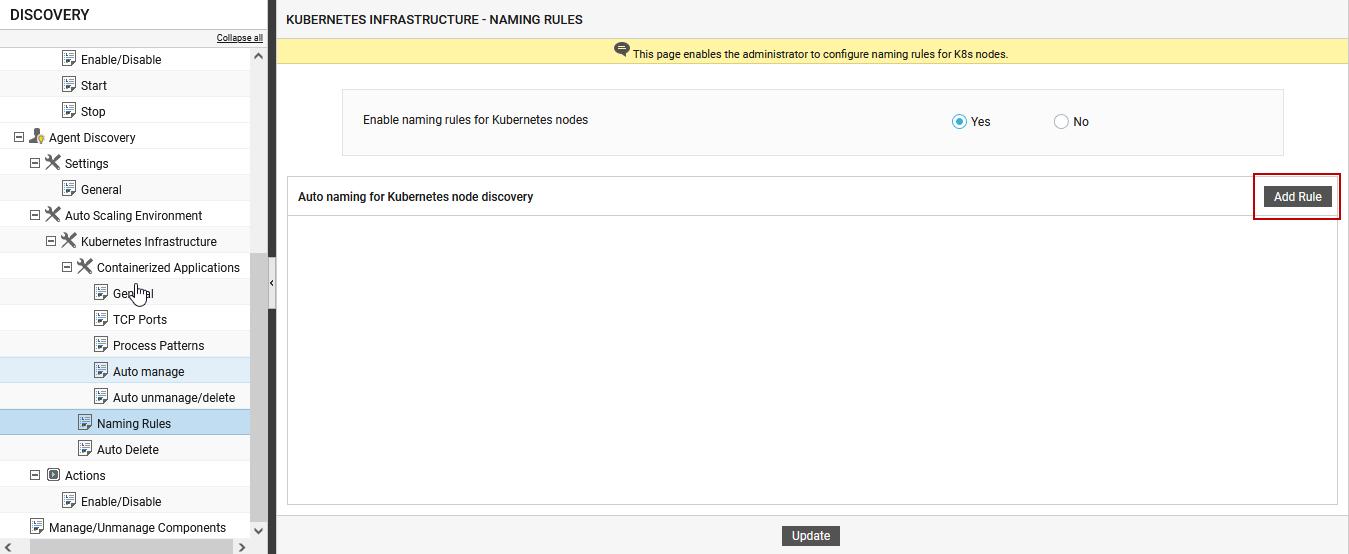
Figure 2 : The Auto naming for Kubernetes node discovery section
-
Clicking on the Add rule button brings up the auto naming for kubernetes node discovery popup window (see Figure 3) wherein you have to specify the common prefix in the host names of the discovered nodes and the short name that will replace the prefix.
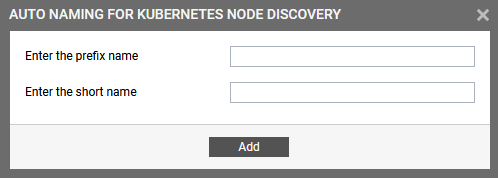
Figure 3 : The AUTO NAMING FOR KUBERNETES NODE DISCOVERY window
-
For instance, lets say that the Kubernetes nodes in a Tanzu cluster are named as follows:
tkc-dev-cl01-np-01-9w98f-9c4cc7f5d-5pfqf
tkc-dev-cl01-np-01-9w98f-9c4cc7f5d-9k69c
tkc-dev-cl01-np-01-9w98f-9c4cc7f5d-z8fms
tkc-dev-cl01-np-01-9w98f-9c4cc7f5d-er46kl
tkc-dev-cl01-np-01-9w98f-9c4cc7f5d-ut8lip
In this example, it is clear that the host names of the nodes exceed 32 characters. To prevent those nodes from being discovered with the same nick name, you can configure the naming rules so that the names of the discovered nodes are replaced with the short names which do not exceed 32 characters. Here, the common prefix in all the host names is tkc-dev-cl01-np-01-9w98f-9c4cc7f5d. You can replace this prefix name with a unique short name as shown in Figure 4.
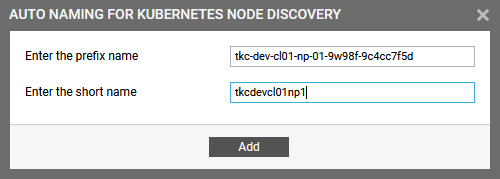
Figure 4 : Configuring a naming rule for the discovered nodes
After specifying the prefix name and the short name, click on the Add button to add the auto naming setting for the Kubernetes nodes. This will enable the eG manager to auto-manage the discovered nodes (that contains the specified prefix name) with unique nick names. For example, the tkc-dev-cl01-np-01-9w98f-9c4cc7f5d-5pfqf node will be auto-managed with a unique nick name i.e., tkcdevcl01np1-5pfqf.
-
The newly added rules will be listed in the Auto naming for Kubernetes node discovery section as shown in Figure 5.
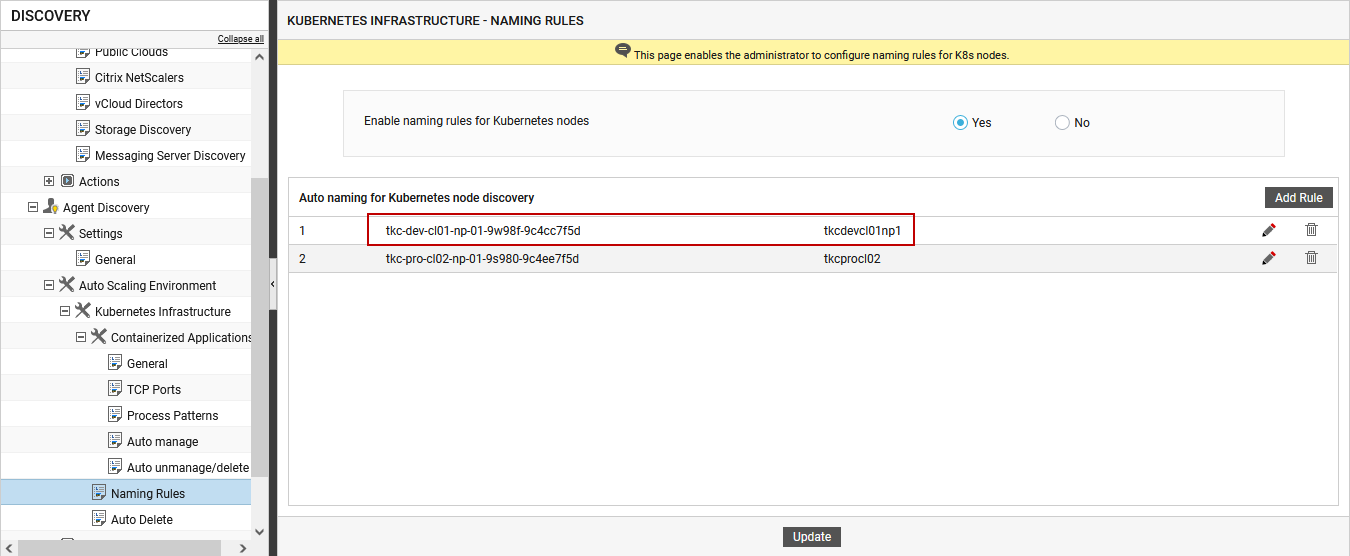
Figure 5 : The list of auto naming rules for Kunernetes node discovery
To delete any of the naming rules, click on the
 (Delete) icon corresponding to that rule. To modify the rule, you can click the
  (Modify) icon against that particular rule.
 - Finally, click the Update button.
