
How to Enable and Configure Audit Settings on Microsoft File Server?
Below are the steps to enable auditing and track events in event logs.
-
Configure the Audit settings to enable the Audit policies for generating the required events in the Security event log.
-
Logon to the Microsoft file server with administrative privileges.
-
Open Local Security Policy through any of the ways mentioned here:
-
Start Menu: Start>Windows Administrative Tools>Local Security Policy
-
Windows Search: Type Local security policy in Search box, and click to open the app that appears.
-
Input Secpol.msc Command in the Run window to open Local security policy.
-
-
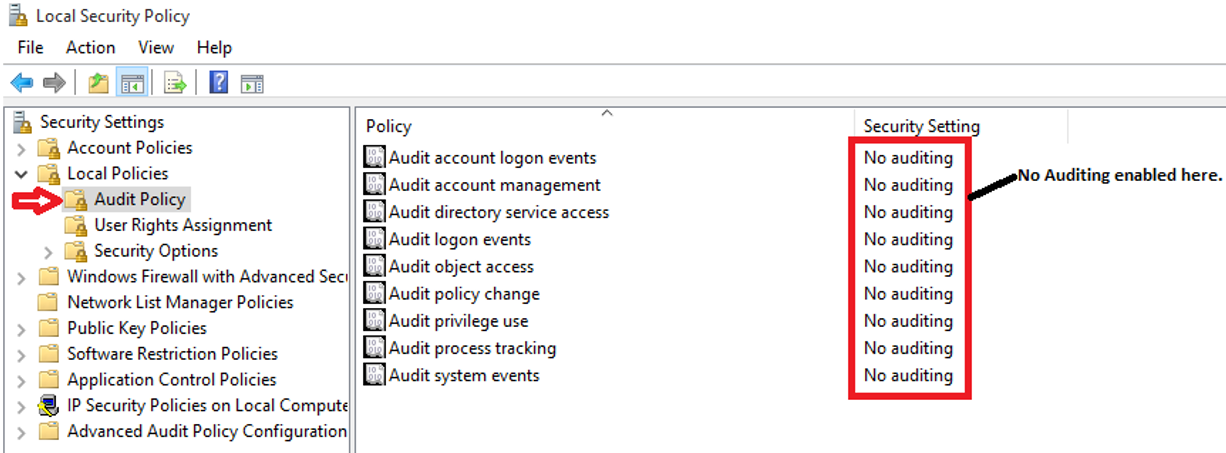
Go to Security Settings and select Local Policies.
-
Under Audit Policy, make sure that audting is not enabled for the policies, (see Figure 1.
-
Select Audit object access and turn auditing on for both success and failure.
-
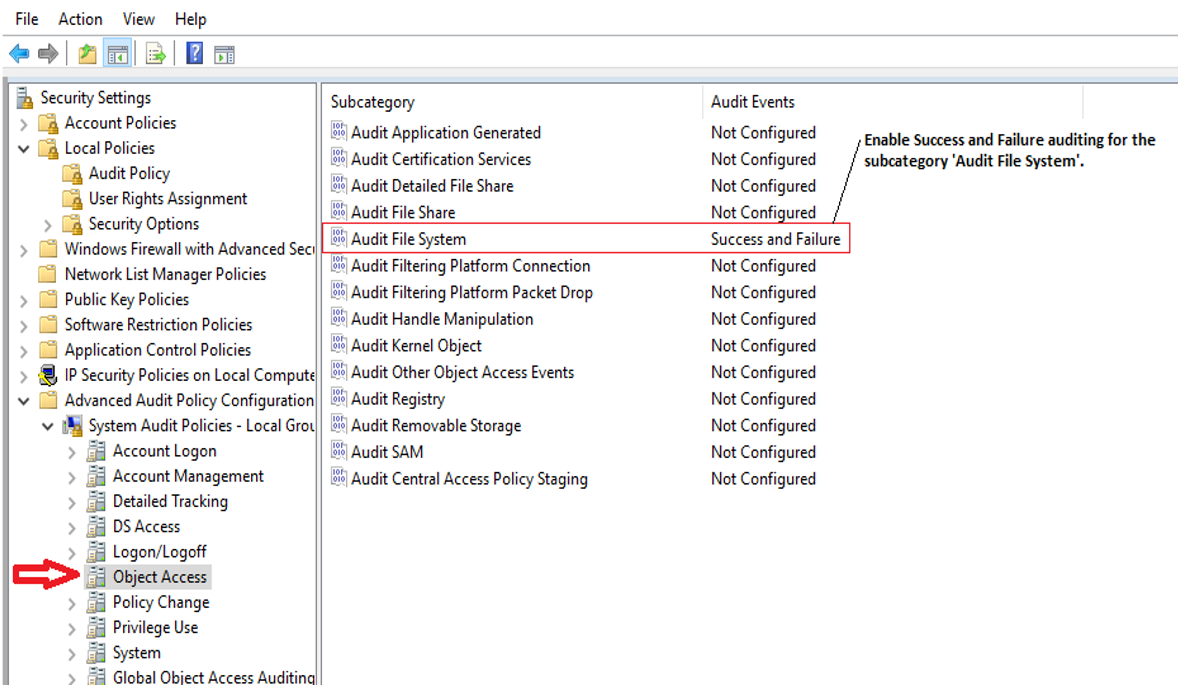
Navigate to Local Security Policy>Security Settings>Advanced Audit Policy Configuration>System Audit Policies > Local Group Policy Object>Object Access.
-
Configure an Audit File System policy as shown in Figure 2.
-
Open the Properties window and define the settings for Success and Failure events.
-
Click Apply and Ok after enabling the audit policy.
-
To apply policy on the domain, execute the following command in Command Prompt:
gpupdate /force
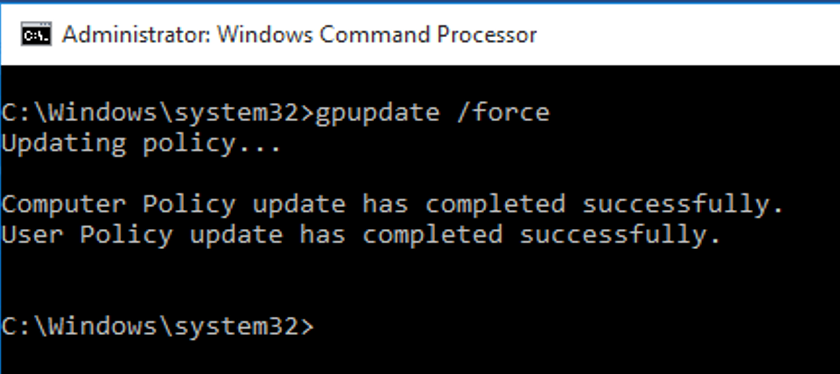
Figure 3 : To update changes in the policy
-
-
Configure the audit settings for the files/folders in the shared folders to be monitored.
-
Open Windows Explorer and navigate to the shared folder that you want to monitor.
-
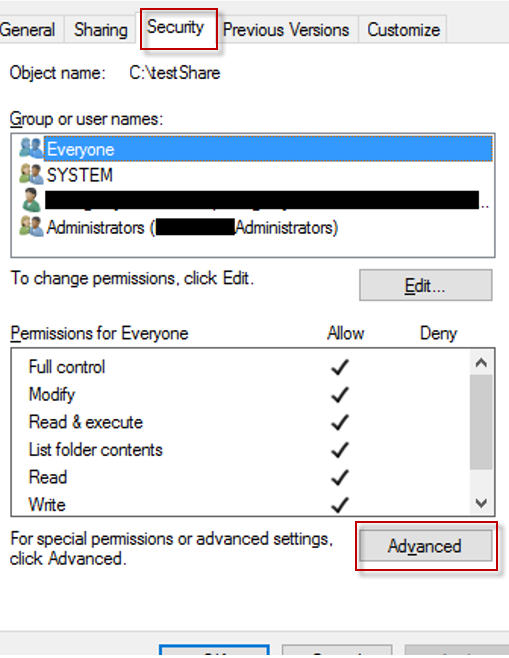
Right click on it and select Properties from the context menu. Then, go to the Security tab and click the Advanced button to open Advanced Security Settings as shown in Figure 4.
-
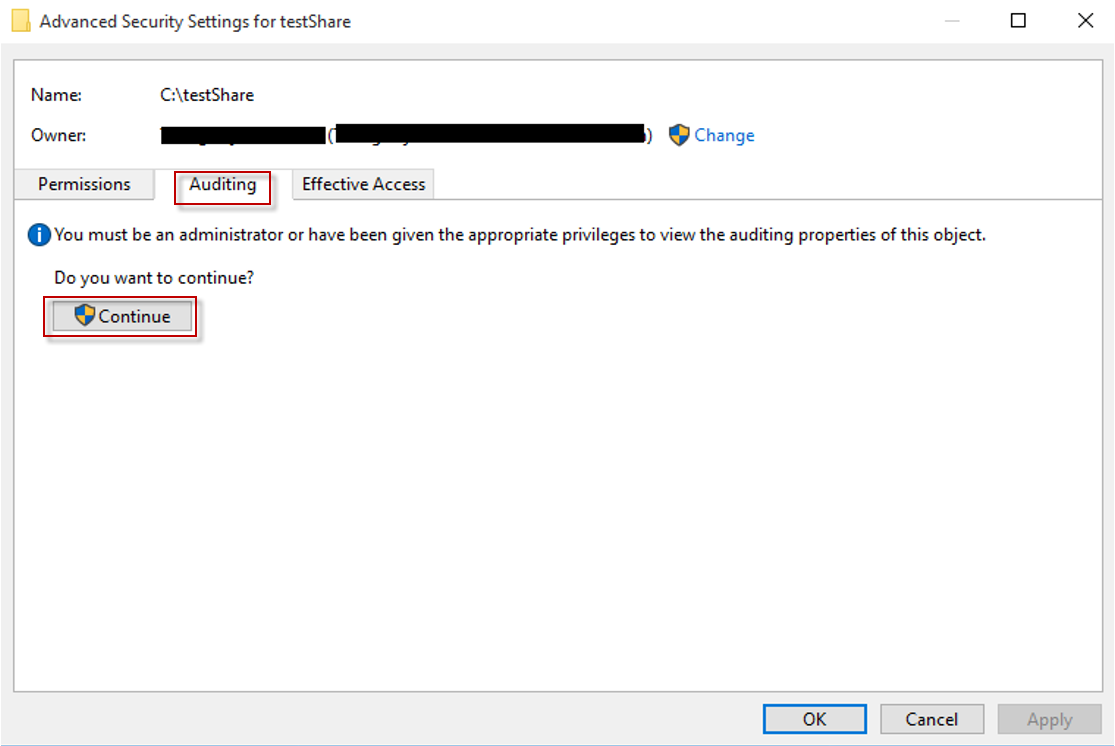
In the Advanced Security Settings for window, switch to Auditing tab which displays already existing auditing entries. Then, click the Continue button in Figure 5.
-
To create a new entry,click Add button in the window that appears ( see Figure 6)

-
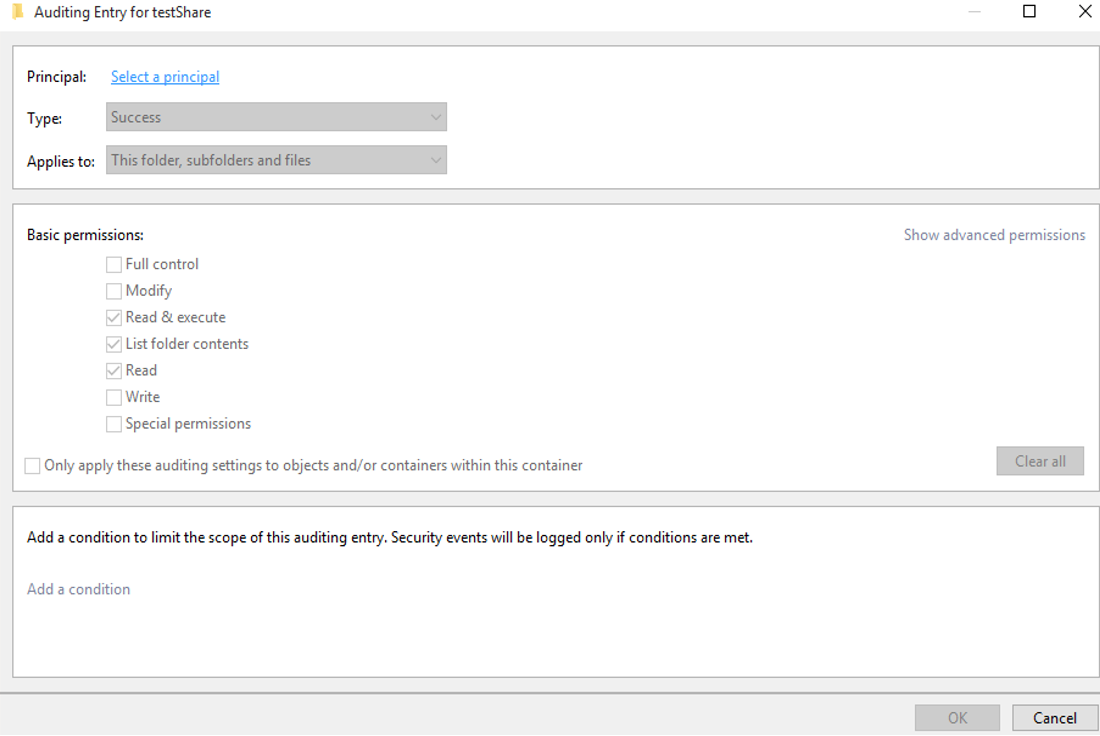
Then, specify the following details in the Auditing Entry for window that appears as shown in Figure 7:
-
Principal: Enter the names of the users whose access you wish to audit.
-
Type: Select the type of access you want to audit. It is preferable to audit "All" changes.
-
Applies to: Select whether you want to audit file/folder creation and deletion only in this folder, or in all sub folders.
-
Basic permissions: Choose the types of permissions you want to audit. Click Advanced permissions button on the right and choose the following:
-
Create files/write data
-
Create folders/append data
-
Delete sub folders and files
-
-
-
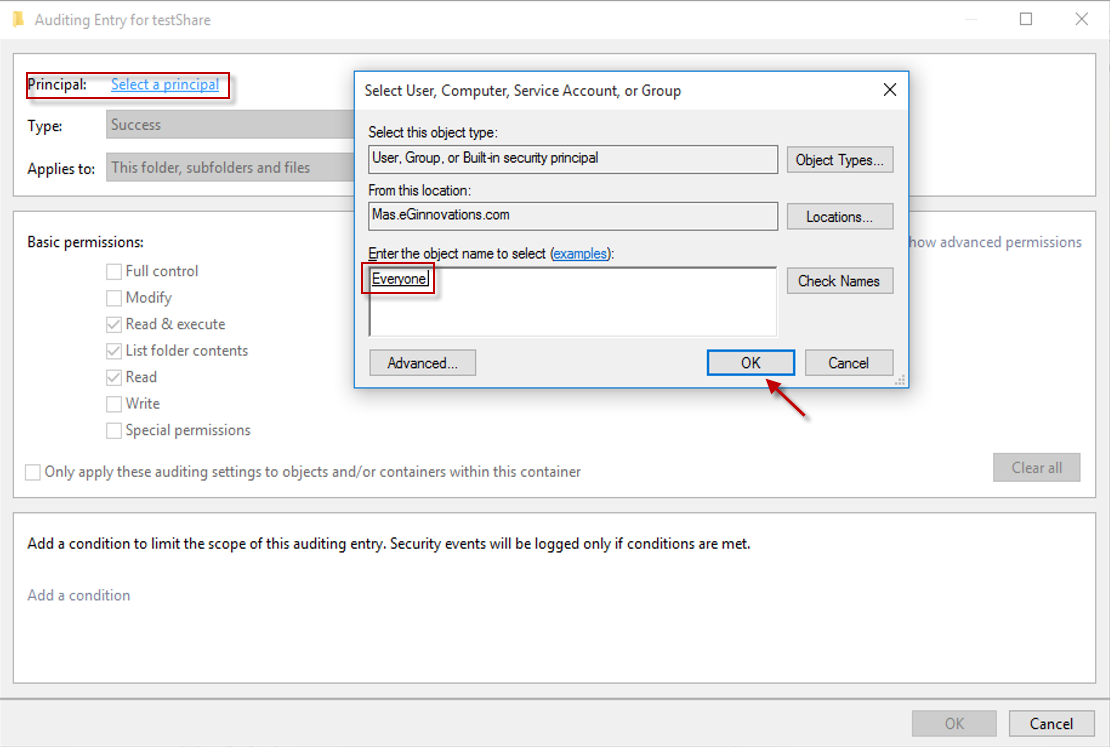
Now, click the Select a Principal link provided against Principal (see Figure 8) option to select the users whose activities you want to track. For tracking the activities of all the users, enter Everyone in Enter the object name box as shown in Figure 8
-
Click Ok after finalizing your selection.
-
Next, select All option from Type drop-down menu. If you want to audit all the activities, select the Full Control checkbox. under Basic permissions, as given in Figure 9
-
Click OK to close the Auditing Entry for window.

-
-
To view audit logs in Event Viewer
-
Every time a user accesses the selected file/folder and changes the permission on it, an event log will be recorded in the Event Viewer.
-
To verify whether the event IDs are generated when a user performs an action in the shared folder, follow the steps given below:
-
Open Event Viewer.
-
Expand Windows Logs and select Security.
-
Refresh the events, and note down the Event ID, date and time of the latest event.
-
Then, perform a delete operation in the shared folder to be monitored, and note down the name of the deleted object.
-
Now, refresh the Events again, and note down the Event ID, date and time of the latest event.
-
Then, in the Event Viewer, click Filter current log.
-
Enter a Custom range in the Logged text box. That is, enter the time of first noted event in the From field and enter the time of last noted event in the To field.
-
Enter the event ids 4659, 4660, 4663 in the text box showing <All Event IDs>.
-
Then, click OK.
-
Now check whether you are able to see the Event IDs 4659, 4660, 4663, and also click Find and check whether you able to find the events for the deleted object name.
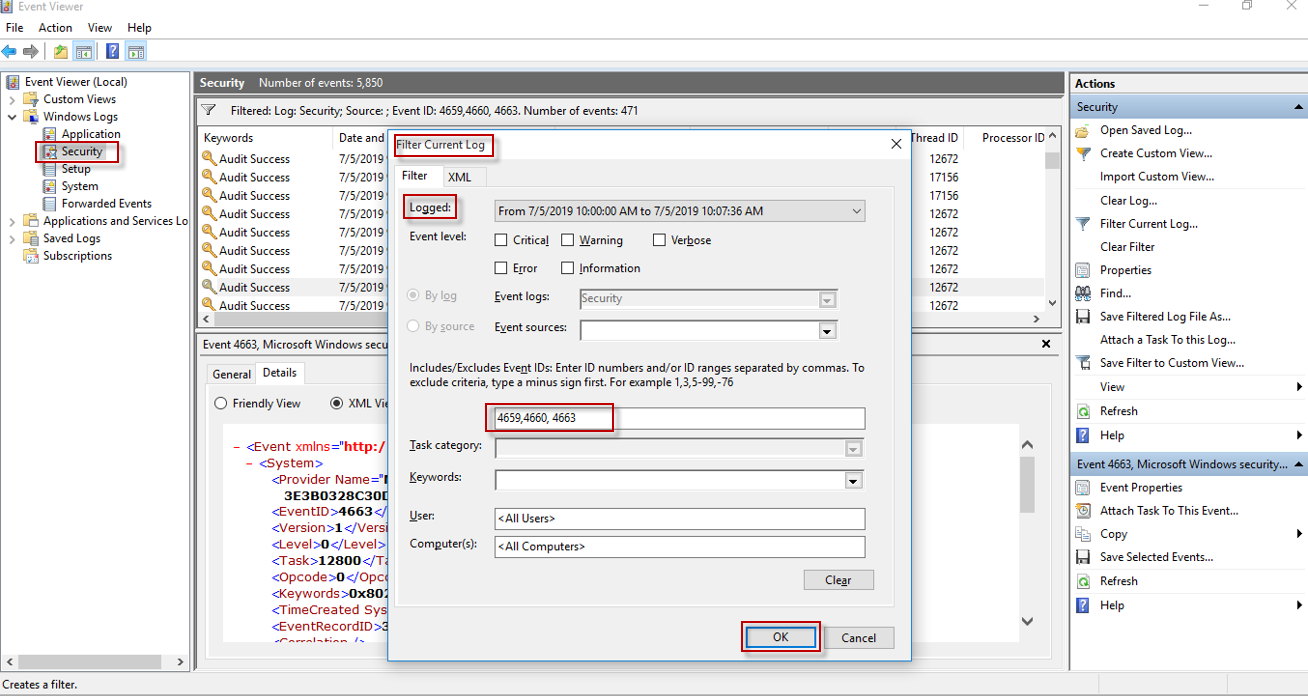
Figure 10 : Event Viewer
-
-
-
Configure Security Event Log size and retention settings
To configure the event log size and retention method
-
Open Event Viewer.
-
Expand Windows Logs and select Security.
-
Right Click Security and select Properties.
-
Make sure Enable logging is selected.
-
Configure Maximum log size not less than 512 Mb.
-
Configure When maximum event log size is reached retention method for security log to Archive itself when full, do not overwrite events.
-
