
How to Use the Web App Simulator?
The following sections will describe in detail on how to record a transaction and configure the Web App Simulation component for monitoring.
How to Record a Transaction?
The Web App Simulation Recorder is a standalone desktop tool that is packaged with the eG agent and is installed on the computer / VM from where the simulation will happen. This is used to simulate the required web transactions and record the entire simulation to be played back at custom intervals later on.
To record a transaction, do the following:
- Login to the host on which the eG agent is installed.
- Execute the WebAppSimulationRecorder.exe from the <EG_INSTALL_DIR>\lib\Synthetic folder.
-
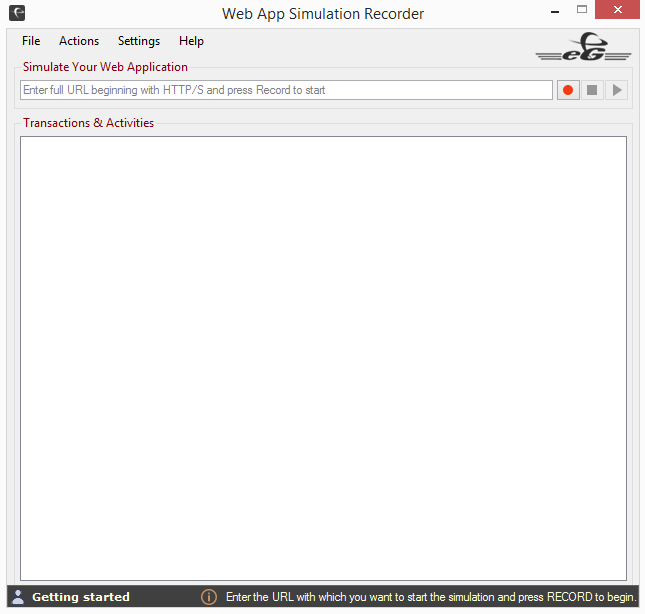
Figure 1 will then appear.
-
Here, specify the URL of the website using which you wish to record a sequence of transactions to build a script. Let us take http://teleportal.acme.com as an example.
-
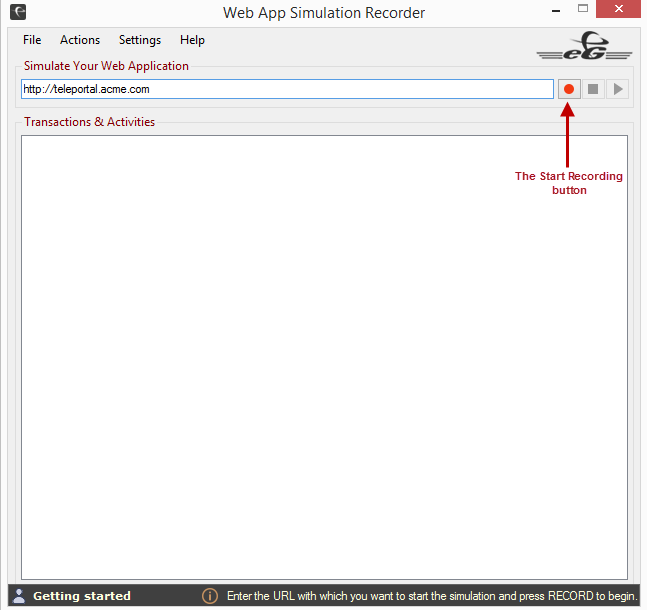
In Figure 2, once you enter the URL, click the Start Recording button. Google Chrome browser opens automatically and the simulator hits the specified URL in Figure 2. Figure 3 will then appear prompting you to start the recording.

-
Click the OK button in Figure 3 to start the recording.
- The next step towards building the script is to start the recording. The primary purpose of the recording is to start capturing the user transactions that are to be emulated.
-
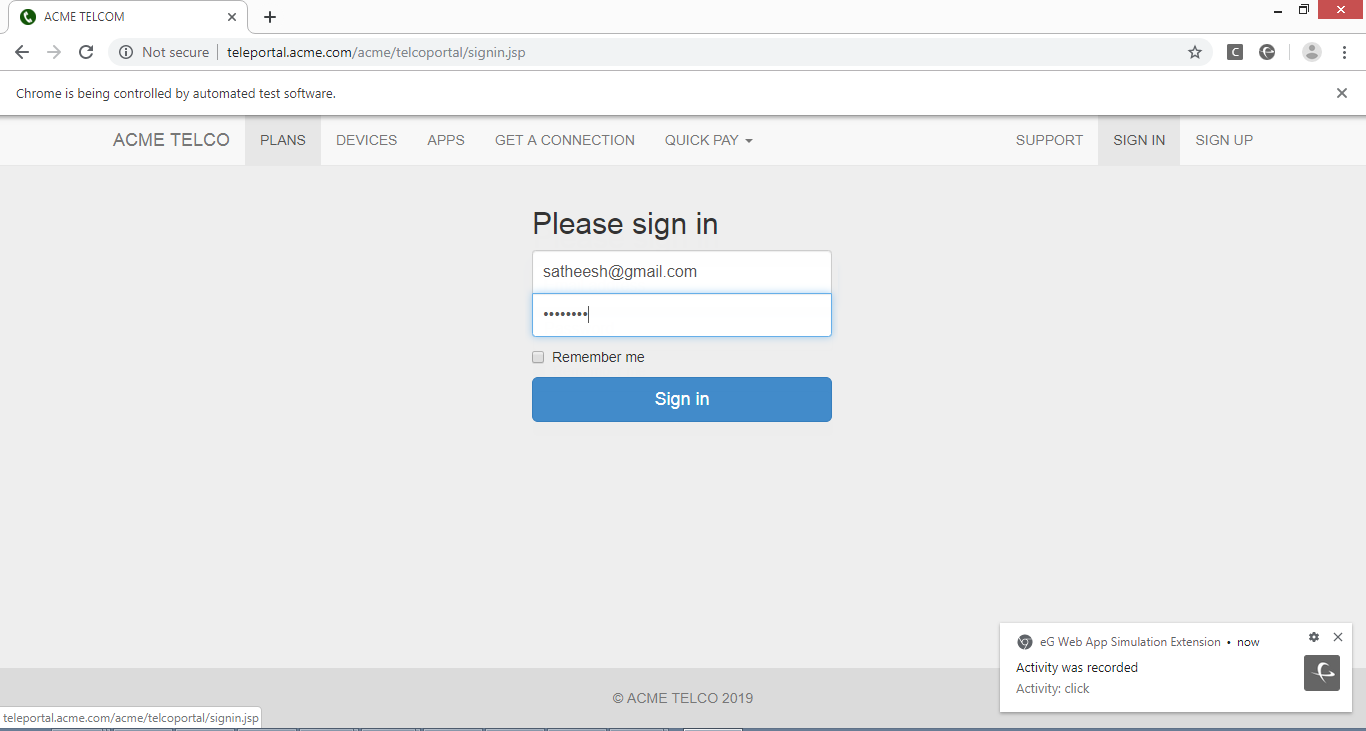
Each activity that you do on the website will be recorded. For example, let us say take the case of recharging a mobile with a pre-paid plan. For this, in our example, we login into the website, ascertain the best pre-paid plan, proceed to recharge by making the payment. These transactions and activity pertaining to the transactions will be recorded in sequence.
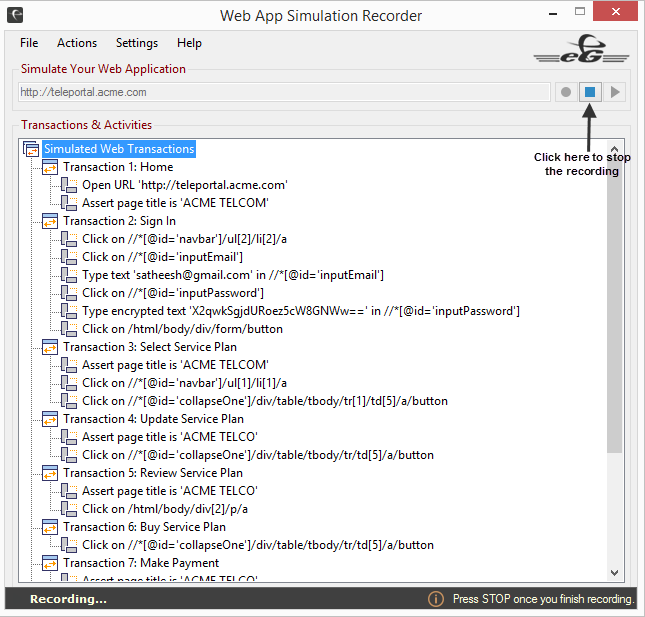
- Figure 4 captures each URL hit on the target web app as a transaction and every action (mouse click, keystroke etc) as an Activity. You can even use the Web App Simulation Recorder to record a transaction/activity where TOTP based two-factor authentication is used for user authentication. To know more on how TOTP based two-factor authentication works with web applications / web sites, refer to How TOTP based Two-factor Authentication Works With Web Applications?.
-
While you are recording a simulation, you are allowed to verify the page title or a text in the web page. This helps in maintaining a smooth navigation between web pages while replaying the simulation. To verify the page title, right click on the Google Chrome browser and follow the menu sequence: eG Web App Simulation Extension -> Assert Title (see Figure 5).
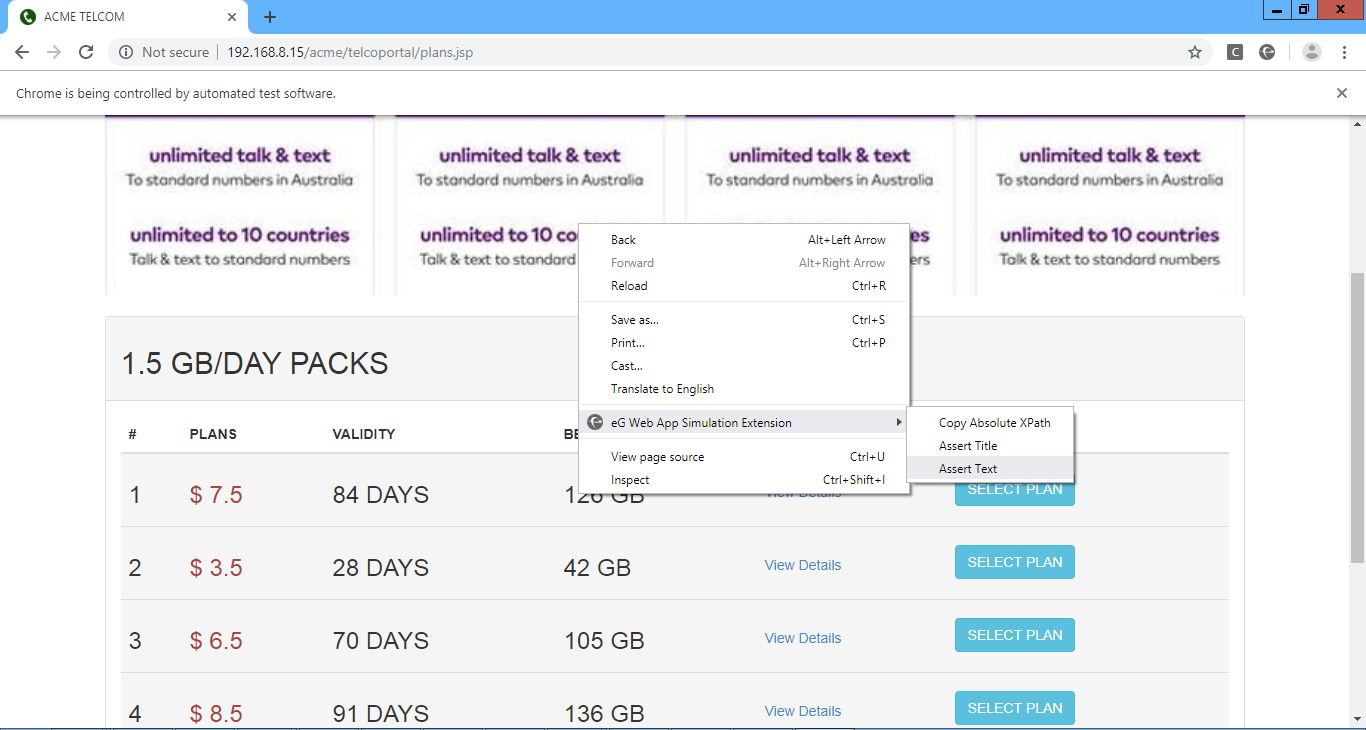
Figure 5 : Verifying the title of the web page
This will ensure that the title of the web page is verified. In our example, the page title is ACME TELCOM (see Figure 5) and the same will be verified while replaying the simulation. This will be added as an activity while performing the simulation (see Figure 6). Similarly, you can even verify a text in the web page. For example, you can verify the Payment Successful message in the web page while performing the simulation.
-
Once you have performed all the required transactions, you can stop the recording by selecting the Stop Recording button that appears in Figure 6.
-
Once you have stopped the recording, you can even replay the recording to verify if you have perfectly recorded the script. For this, press the Play button as shown in Figure 7.
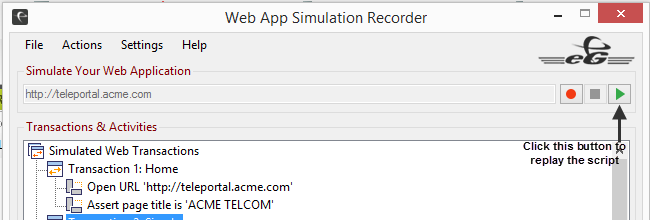
Figure 7 : Clicking the Play button to replay the recorded script
-
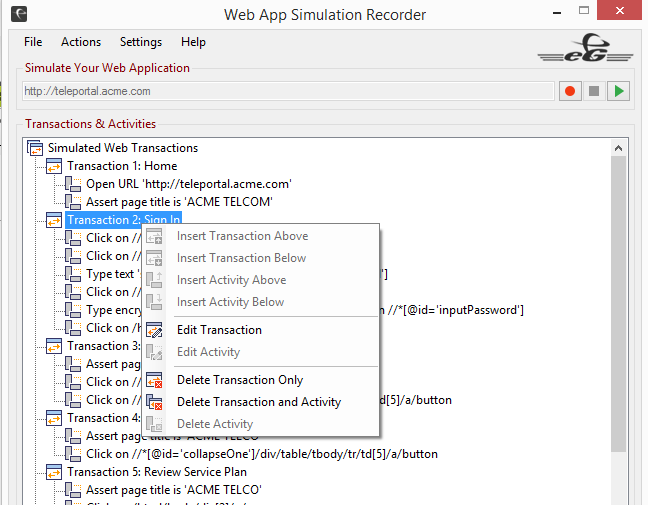
You are even allowed to modify / delete a transaction at any point of time. For this, you need to right click on a Transaction. Figure 8 will then appear using which you can provide your own name for that transaction. Note that you are not allowed to delete the very first transaction that you have recorded.
-
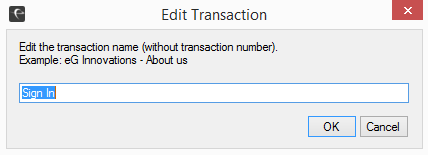
When you click the Edit Transaction, Figure 9 will appear prompting you to rename the transaction.
- Similarly, you can delete an individual transaction alone or delete the transaction along with the activities performed in the chosen transaction.
-
You are even allowed to modify / delete an activity too. For this, you need to right click on an Activity and click the Edit Activity option. Figure 10 will then appear using which you can select the Activity and the Target:Value pair of the chosen activity.

Figure 10 : Editing an Activity
The below table lists the purpose of each Activity in detail.
Activity
Description
Target
Value
AssertText
Asserts an expected page text. Verifies whether the text in the Target location is the same as the Value specified
The location (XPath) of the text that should be matched against the Value.
The string that is expected in the Target location specified.
AssertNotText
Asserts a page text that is not expected. Verifies whether the text in the Target location does not contain the Value specified
The location (XPath) of the test should not match against the Value.
The string that is not expected in the Target location specified.
AssertTitle
Asserts an expected page title. Gets the title of a website and checks it against the provided Target text
The expected title.
Not applicable
AssertNotTitle
Asserts if a page title that is not expected appears. Gets the title of a website and checks it against the provided Target text
The title should not contain the Target text.
Not applicable
ClearandType
Clears and sets the value of an input field, as though you typed it in.
The location (XPath) where the Value should be typed.
The input string to be typed in the Target location.
Click
Clicks on an element (button, link, check box etc).
The location (XPath) of the element to be clicked at.
Not applicable
ClickAt
Moves mouse inside the element in the Target location and clicks it.
The location (XPath) of the element to be clicked at.
Not applicable
CloseWindow
Closes the tabs and windows
Index of the tab to be selected. 0 is the main window/tab, 1 the first tab to the right, 2 the second, and so on.
Not applicable
DoubleClick
Double-clicks on the element in the Target location.
The location (XPath) of the element to be double-clicked.
Not applicable
ExitFrame
Exits the current frame and moves to the top of the web page.
Not applicable
Not applicable
Pause
Delays the execution of the simulation by a specified time.
The duration (in secs) of the delay.
Not applicable
Scroll
Scrolls the web page up or down.
X,Y coordinates of the web page to be scrolled. Example: 0,400.
Not applicable
Select
Selects the specified Value from the element (drop-down/combo box/list box) in the Target location.
The location (XPath) of the element.
The value to be selected from the element in the Target location.
SelectFrame
Switches to the frame that uses the Target index.
Pass the frame index. 0 is the first frame, 1 is the frame below it, and so on. For nested iframe, the format is 0,1,2,3,...n. Example: 0 for an iframe (OR) 0,5,2 for a nested iframe.
Not applicable
Sendkeys
The location (XPath) of the element from which the keystrokes have to be sent.
The location (XPath) of the element from which the keystrokes have to be sent.
Key or Value to be sent. Refer the table below for the format in which the Value needs to be provided:
Key Value Enter ${KEY_ENTER} Escape ${KEY_ESC} Tab ${KEY_TAB} Delete ${KEY_DELETE} or ${KEY_DEL} Backspace ${KEY_BACKSPACE} or ${KEY_BKSP} Up Arrow ${KEY_UP} Down Arrow ${KEY_DOWN} Left Arrow
${KEY_LEFT} Right Arrow
${KEY_RIGHT} Home
${KEY_HOME} End
${KEY_END} Page Down
${KEY_PAGEDOWN} Page Up
${KEY_PAGEUP} Alt
${KEY_ALT+*} CTRL
${KEY_CTRL+*} Shift
${KEY_SHIFT+*} * - Represents a Character or key such as CTRL+c, Alt+Tab, etc.
Submit
Submits the element in the Target location.
The location (XPath) of the element to be submitted.
Not applicable
Type
Sets the value of an input field, as though you typed it in.
The location (XPath) of the element in which the Value is to be typed.
The value to be typed in the element in the Target location.
TypeWithEncrypt
Sets the Value of an input field, as though you typed it in and encrypts that Value.
The location (XPath) of the element in which the Value is to be typed.
The value to be typed in the element in the Target location.
StoreText
Gets the text of an element and stores into a variable for later use.
The location (XPath) of the element that contains text to be stored.
The name of a variable. Only uppercase letters, digits and underscore (_) characters are allowed.
StoreValue
Gets the value of an element and stores into a variable for later use.
The location (XPath) of the element that contains value to be stored.
The name of a variable. Only uppercase letters, digits and underscore (_) characters are allowed.
Echo
Prints the specified string or variable in log file.
The value to be printed in log file. Use @{VariableName} format to print the value of a stored variable.
Not applicable
GoBack
Go back to previous page in the browser history. This is exactly similar to what happens when you click on the Back button in your browser, if you have some history in backward direction.
Not applicable
Not applicable
GoForward
Go back to next page in the browser history. This is exactly similar to what happens when you click on the Forward button in your browser, if you have some history in forward direction.
Not applicable
Not applicable
GoToURL
Loads a new web page in the current browser window.
The full URL beginning with HTTP/S of the new web page.
Not applicable
AssertFileAvailable
Assert an expected file's availability Verifies, whether the specified file in Target location is available.
The absolute path (includes file name) of the file. Also can use wildcard specifiers in file name, e.g., *txt to search files with extension or *.* to search any files in specified location.
Not applicable
AssertFileNotAvailable
Assert an expected file's unavailability Verifies, whether the specified file in Target location is not available.
The absolute path (includes file name) of the file. Also can use wildcard specifiers in file name, e.g., *txt to search files with extension or *.* to search any files in specified location.
Not applicable
AssertDesktopWindowExistByTitle
Asserts an expected window displayed on the system's desktop with a given title. Enumerates all desktop windows title and verifies whether the text in the target location is present.
The string that is expected to be present (case insensitive and exact match) on desktop windows title.
Not applicable
AssertDesktopWindowNotExistByTitle
Asserts an expected window not displayed on the system's desktop with a given title. Enumerates all desktop windows title and verifies whether the text in the target location is not present.
The string that is expected not to be present (case insensitive and exact match) on desktop windows title.
Not applicable
CloseDesktopWindowByTitle
Close the desktop windows by its title. Enumerate all desktop windows and close
The title (case insensitive and exact match) of desktop window to be closed.
Not applicable
CreateFile
Creates a file at the specified location if not exists and writes given string to the file.
The absolute path (includes file name) of the file to be created.
The input string to be written in the file.
OpenFile
Opens a file with associated / default application from the specified location.
The absolute path (includes file name) of the file to be opened. Also can use wildcard specifiers in file name, e.g., *.txt to open latest file with the extension or *.* to open latest file in specified location.
Choose another application to open file e.g., wordpad.exe to open any text file. (optional)
DeleteFile
Deletes a file in the specified location.
The absolute path (includes file name) of the file to be deleted. Also can use wildcard specifiers in file name, e.g. *.txt to delete files with the extension or *.* to delete any files in specified location.
Not applicable
AssertProcessRunningByName
Asserts an expected process is running on the local computer with given name. Verifies whether the specified process in Target location is running.
The friendly name (case insensitive and exact match) of the process. It does not include the .exe extension or the path.
Not applicable
AssertProcessNotRunningByName
Asserts an expected process is not running on the local computer with given name. Verifies whether the specified process in Target location is not running.
The friendly name (case insensitive and exact match) of the process. It does not include the .exe extension or the path.
Not applicable
StopProcessByName
Kill or focus a termination of the specified process(es) running on the local computer by its friendly name.
The friendly name (case insensitive and exact match) of the process(es) to be stopped. It does not include the .exe extension or the path.
Not applicable
CreateOrOverwriteFile
Creates a file at the specified location or overwrites if already exists.
The absolute file path (includes file name) of the file to be created or overwritten.
The input string to be written in the file.
AssertURLTextAvailable
Asserts a specified text present on the current page/URL. Gets the site URL and checks it against the provided Target text.
The string that is expected to be present on the page URL.
Not applicable
AssertURLTextNotAvailable
Asserts a specified text present not on the current page/URL. Gets the site URL and checks it against the provided Target text.
The string that is not expected to be present on the page URL.
Not applicable
AssertVariableValueExist
Asserts a specified value exists in the stored variable. Verifies whether value of the stored variable in the Target location is same as the value specified.
The name of a variable. Use @{VariableName} format to validate the value of specified variable.
The string that is expected to be present in the variable.
AssertVariableValueNotExist
Asserts a specified value not exists in the stored variable. Verifies whether value of the stored variable in the Target location is not same as the value specified.
The name of a variable. Use @{VariableName} format to validate the value of specified variable.
The string that is not expected to be present in the variable.
StoreMFAToken(TOTP)
Time-based One Time Password (TOTP) is a multi-factor authentication method to generate a one-time password (OTP) typically used for authenticating users. Generates TOTP token from the shared secret key and stores into a variable for later use.
The shared secret key used to generate a one-time password.
The name of a variable to store the one-time password. Only uppercase letters, digits, underscore (_) characters are allowed.
EnumDesktopWindows
Enumerate all desktop windows and print its details in log file. Useful for debugging.
Not applicable
Not applicable
ImplicitClick
Implicit clicks on an element (button, link, checkboc, etc)
The location (XPath) of the element to be clicked at.
Not applicable
ImplicitType
Sets the value of an input field, as though you implicitly typed it in.
The location (XPath) of the element in which the Value is to be typed.
The value to be typed in the element in the Target location. Use @{VariableName} format to type the value of a stored variable.
MouseOver
Moves mouse over (hover) the element in the target location.
The location (XPath) of the element to be moused over.
Not applicable
RefreshPage
Refreshes the current page as if you have pressed F5 button on the browser.
Not applicable
Not applicable
SelectWindow
Switches to a browser tab or a window that uses the Target index.
Index of window/tab to switch to. 0 is the main window/tab, 1 is the first tab to the right, 2 is the second, and so on.
Not applicable
WaitForElementDisable
Wait for a target element to be either disabled or invisible on the page.
The location (XPath) of the element to be disabled.
The amount of time to wait (timeout in secs).
WaitForElementEnable
Wait for a target element to be either visible or enabled on the page.
The location (XPath) of the element to be enabled.
The amount of time to wait (timeout in secs).
WaitForElementInvisible
Wait for a target element to be either invisible or not present on the page (DOM).
The location (XPath) of the element that should be invisible.
The amount of time to wait (timeout in secs).
WaitForElementNotPresent
Wait for a target element Not to be present on the page (DOM).
The location (XPath) of the element that should not be present.
The amount of time to wait (timeout in secs).
WaitForElementPresent
Wait for a target element to be present on the page (DOM).
The location (XPath) of the element that should be present.
The amount of time to wait (timeout in secs).
WaitForElementVisible
Wait for a target element to be present on the page (DOM) and visible.
The location (XPath) of the element that should be visible.
The amount of time to wait (timeout in secs).
StopCitrixWorkspaceProcess
Kill or force the termination of the Citrix Workspace process running on the local computer.
Not applicable
Not applicable
SendKeys
Support to use Function keys on the keyboard from F1 to F12.
Sends keystrokes. This is useful for handling browser pop-ups (like Windows authentication dialogs) and dynamic UI widgets (like auto-completing combo boxes) that require explicit keyboard events.
Optional. The location (XPath) of the element from which the keystrokes have to be sent.
Key or value to be sent. Refer to below table for the format in which Value has to be provided.
RunJavaScript
Execute a snippet of JavaScript in the context of the currently selected frame or window, and store the return value in a variable for later use.
For e.g., you can use Javascripts to make REST API calls to a web site or you can do web requests using XHR, Fetch or Ajax commands.
The JavaScript snippet to run. To store the return value, use the 'return' keyword and provide a variable name in the value input field. The return value must be a String, Number, or Boolean.
To pass arguments to JavaScript, use the @{VariableName} format at the end of the script and access the arguments by their index, such as 'arguments[0]'.
Maximum of two arguments are supported.
Optional.
The name of the variable to store the JavaScript return value. Only uppercase letters, digits and underscores (_) are allowed.
AssertFileSizeInKB
Check size of file in KB.
For e.g., if a PDF is downloaded, verify if the size of the file is in KB. You can validate the using the following validators:
- Equal to
- Greater than or Equal to
- Lesser than or Equal to
Assert the expected file size in KB. Verifies whether the size (in KB) of the file at the Target location matches the specified value.
The absolute path (including the file name) of the file.
Wildcard specifiers can also be used in the file name, such as '*.txt' to search for files with a specific extension or to search for any files in the specified location.
The expected file size (in KB).
RunWindowsCommand
Run a command on Windows Command Prompt using non-elevated privilege.
Run commands in Windows Command Prompt (cmd) with non-elevated privileges. This opens Command Prompt in the user session from the background, executes the provided command in the Target location, and returns the console output. The command output can be stored in a variable for later use.
Specify the command to run.
Optional.
The name of the variable to store the console output as a string. Only uppercase letters, digits, and underscore characters are allowed.
ReadFileAndStore
Read a text format file and store the contents of the file in a variable.
Read the entire contents of a file from the specified location as plain text and store it in a variable for later use.
The absolute file path (including the file name with extension) to read. Supported file extensions are .txt, .log, .json, .xml, and .csv.
The name of the variable to store the file contents as a plain text string. Only uppercase letters, digits and underscores (_) are allowed.
ParseJSONVariableAndStore
Parse a JSON variable and store the value.
Read JSON data from a variable, parse it using a search query (path to element), and store the results in another variable\nfor later use. This allows you to select and extract specific data from a variable that contains JSON information.
Specify a search query(case-sensitive and exact match) to run.
The name of a variable to store the return value of search query. Only uppercase letters, digits and underscore characters are allowed.
ParseTextVariableAndStore
Read plain text strings from a variable, parse it using a search query (path to the string), and store the results in another variable for later use. This allows you to select and extract specific data from a variable that contains textual information.
Specify a search query(case-sensitive and exact match) to run.
The name of the variable to store the return value of the search query.
Only uppercase letters, digits, and underscore characters are allowed.
StopProcessByTaskKillCommand
Stop a process by killing the task using Command Prompt.
Kill or force the termination of specified process(es) running on the local computer using the Windows 'taskkill' command.
This allows you to end the process(es) by name, ID, or window title.
Specify the filter parameters for the process(es) to be stopped.
Not applicable.
StopProcessByID
Stop a process by specifying the Process ID.
Kill or force the termination of the specified process running on the local computer by its PID.
The PID of the process to be stopped. Use the @{VariableName} format to retrieve the PID from a stored variable.
Not applicable
Sometimes, applications/web sites may have pop-ups or alerts (e.g., advertisements) that come up occasionally during user access. These pop-ups would cause the simulation to fail, resulting in false alerts. These false alerts may frustrate the IT administrators. To avoid such false alerts, you can check the Allow this activity (Optional Activity) to fail check box (see Figure 10) while adding/editing an activity that includes the pop up or alert. This would ensure that the optional activity is allowed to fail and the simulation proceeds without disruption.

Figure 11 : An activity marked as an optional activity
The color change of the icon (see highlighted icon in Figure 11) preceding the activity clearly indicates that the activity has been marked as an optional activity.
Note:
The time taken for this activity to fail will not be included in the Total simulation time reported by the Simulated Web Transactions Test.
-
Image Recognition/OCR Capability allows you to record and simulate any action that is performed outside the Browser Page scope. A few use cases where the Image Recognition/OCR capability will come in handy to the users:
-
A session may start with a browser, but at some point may transition to a native Windows application (e.g., a Citrix session starts with a browser but when launching the session, Citrix WorkSpace App takes over and all further actions happen using Citrix WorkSpace App and the content is not HTML/web-based).
-
Native Windows pop-ups occur during web-based access to an application (e.g., the application is integrated with Windows authentication, printer dialog box, file upload/download dialog box).
-
The workflow requires actions outside of the web page/DOM to be performed (e.g., launch a browser extension, click a bookmark, click a browser menu item).
-
Canvas-based HTML5 applications where bitmaps and images are rendered in a canvas (e.g., Citrix/AVD access from a browser happens using HTML5 browser).
-
Media rich web applications based on Microsoft Silverlight and Adobe Flash/Flex technologies
-
Web applications that use Shadow DOM elements (Shadow DOM acts as a hidden and separate DOM tree attached within a normal DOM)
-
Where image verification/Visual comparison is needed (i.e., Assert/Verify the visibility of images on screen)
To start recording an Image recognition/OCR activity as a transaction, click Ctrl+Shift+F9 from the simulation recorder as shown in Figure 12.

Figure 12 : Message to record Image recognition activities in the recorder
Figure 13 then appears where you would start recording a new transaction and activities for that transaction.

Figure 13 : Recording Image recognition activities
To add a new transaction, click the new transaction link in Figure 13. Figure 14 then appears where you will add the name of the transaction.

Figure 14 : Adding new transaction for recording OCR activities
To record an OCR activity, pick the OCR activity of your choice from the Activity drop down of Figure 13. Then, press Ctrl+F9 to open the snip tool, navigate to the image that you wish to capture and snip (i.e., screen capture) the image. The Target:Value pair is automatically based on the activity that you have chosen.
The following table lists the OCR activities and the purpose of each activity in detail.
Activity
Description
Target
Value
AssertImagePresent
Asserts that the specified image is present on the current screen.
The image that is expected to be present on the screen.
Not applicable.
AssertImageNotPresent
Asserts that the specified image is not present on the current screen.
The image that is expected to be not present on the screen.
Not applicable.
Click
Click on a specified image in the Target location.
The location of the image to be clicked.
Not applicable.
ClickAndType
Click on an image in the Target location and set the value as you typed it in.
The location of the image to be clicked and where the Value is to be typed.
The value to be typed into the image at the Target location.
ClickAndTypeWithEncrypt
Clicks on the image at the Target location and sets the encrypted Value as though you typed it in.
The location of the image to be clicked and where the Value is to be typed.
The encrypted/secret value to be typed into the image at the Target location.
ClickUntilImageIsPresent
Repeatedly clicks on an image at the Target location until it appears on the current screen.
The location where the image is to be clicked.
Not applicable.
DoubleClick
Double-clicks on the image in the Target location.
The location of the image to be double-clicked.
Not applicable.
MouseOver
Moves the mouse over (hovers over) the image in the Target location.
The location of the image to be hovered over with the mouse.
Not applicable.
RightClick
Perform a right-click on the image in the Target location with the mouse.
The location of the image to be right-clicked with the mouse.
Not applicable.
SendKeysIFImagePresent
Send keystrokes to the active foreground window if the specified image is present on the current screen. This is useful for handling window pop-ups that require explicit keyboard events.
The image expected to be present on the screen.
Key or value to be sent on active foreground window.
SendkeysUntilImageIsPresent
Repeatedly send keystrokes to the active foreground window if the specified image is present on the current screen. It is useful for handling window pop-ups that require explicit keyboard events.
The image expected to be present on the screen.
Key or value to be sent on active foreground window.
Type
Sets the value of an input field, as though you typed it in.
The location of the image where the Value is to be typed.
The value to be typed into the image at the Target location.
TypeEncrypt
Sets the value of an input field, as though you typed it in.
The location of the image where the Value is to be typed.
The encrypted/secret value to be typed into the image at the Target location.
WaitForImagePresent
Wait for the Target image to appear on the screen.
The image that is expected to be present on the screen.
The amount of time to wait (timeout in seconds).
WaitForImageNotPresent
Wait until the Target image is no longer present on the screen.
The image that is expected not to be present on the screen.
The amount of time to wait (timeout in seconds).
Check the Allow this activity (Optional Activity) to fail check box if you wish to proceed the simulation without disruption.
By default, the Image search precision on screen(%) list is set to 98 indicating that the image that is recorded as part of an activity will be searched with 98% accuracy during playback in the target window. However, you can set the precision based on your preference.
Note:
You can edit the image recognition transaction/activity in the same manner as that of web-based transaction/activity.
-
-
Often, administrators playback the recorded script multiple times before uploading in order to assure that the playback is replayed in the same sequence that was followed while recording the script. If the playback is not in the recorded sequence, they should immediately start troubleshooting the script and identify the exact transaction / user activity that was problematic. For hassle free troubleshooting, administrators can introduce breakpoints on user activities and replay the script. For this, administrators need to right click on the user activity of their choice, navigate to Breakpoint and click the Add option (see Figure 15). This will introduce a Breakpoint on the user activity. To remove, the Breakpoint, administrators can click the Remove option. To resume the playback from the breakpoint, administrators can click the Continue option.
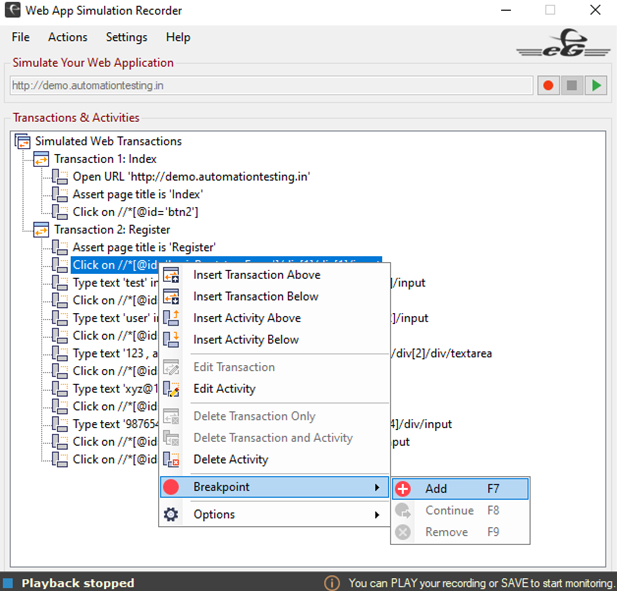
Figure 15 : Adding a Breakpoint
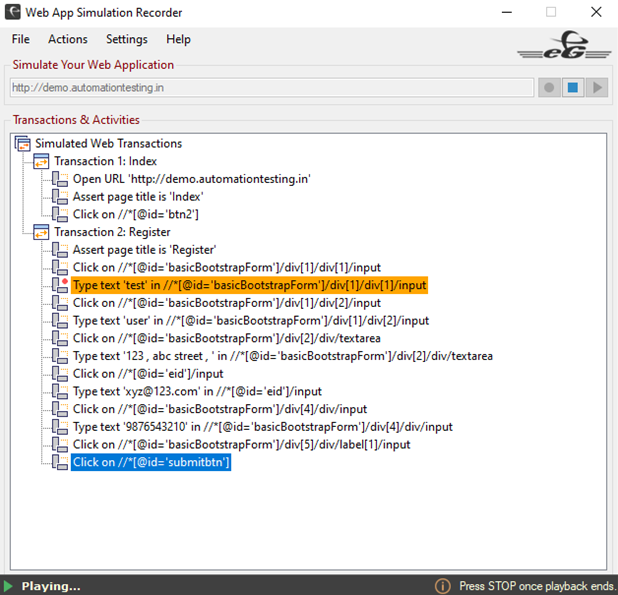
Once a breakpoint is added to the user activity, a red dot will precede the user activity as shown in Figure 16.
-
Sometimes, administrators may want to add a recorded user activity into another transaction without recording the entire script afresh. For this, administrators can right click the user activity, expand the Options menu and use the Copy, Paste Above and Paste Below options (see Figure 17).
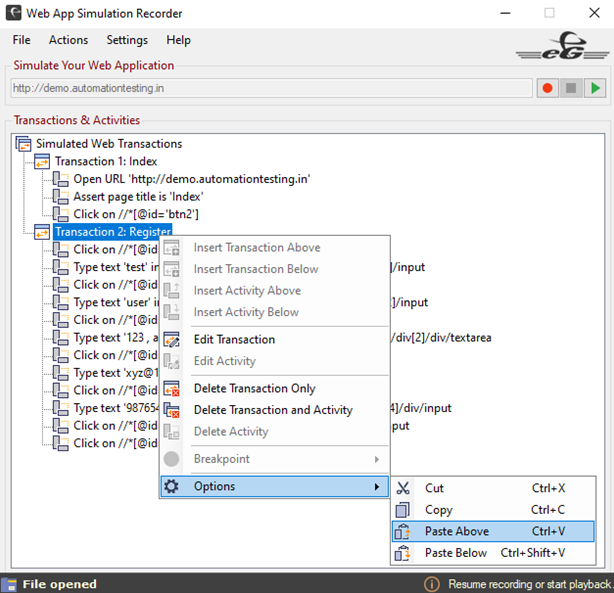
Figure 17 : Copying and pasting an Activity
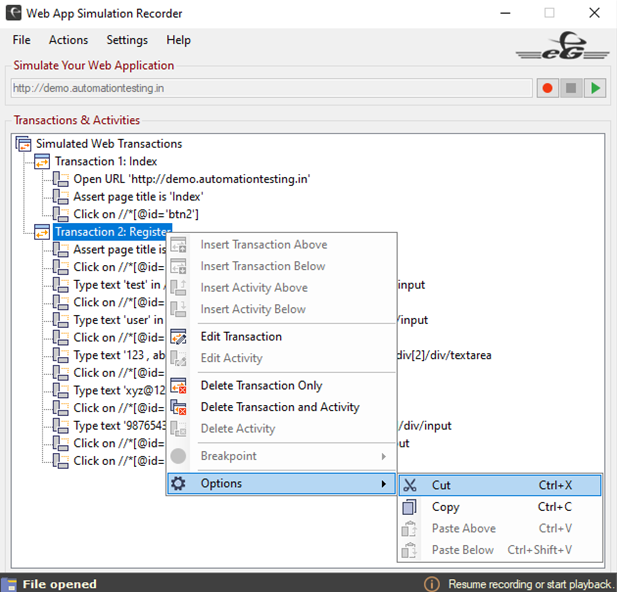
Administrators can even Cut a user activity from a transaction and paste the same activity in a different transaction(see Figure 18).
-
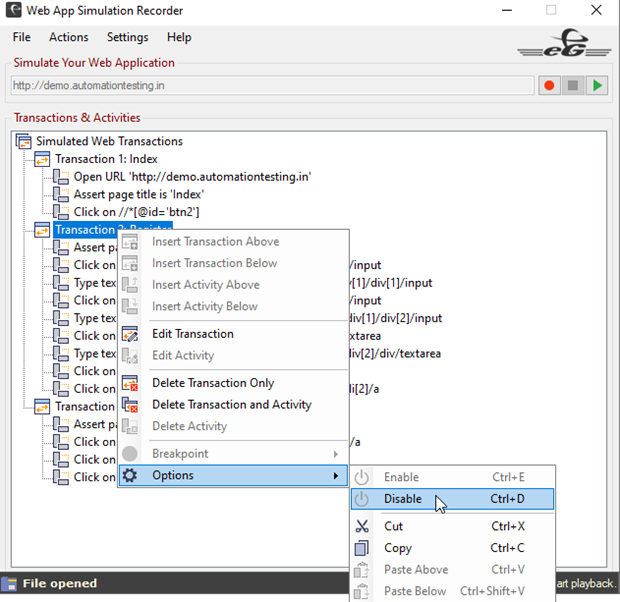
Administrators are even allowed to disable a user activity that they do not wish to execute during simulation. To disable a user activity, administrators can right click on that user activity, expand the Options and choose the Disable option (see Figure 19). To enable a disabled user activity, administrators can choose the Enable option.
-
Sometimes, at the end of every simulation, you may need to do some mandatory tasks on the simulation endpoint such as:
- deleting downloaded files
- logging off user sessions
- stopping Citrix Workspaces process
- closing any open window etc.
For this purpose, now, you can record those tasks as activities and mark them as Post Script activities(see Figure 20). The Post Script activities will be executed irrespective of whether the simulation succeeded/failed.

Figure 20 : Adding a Post Script Activity
To mark an activity as Post Script activity, right click on the activity and navigate through Post Script Activities -> Add Activity. Figure 21 then appears stating that the activity is successfully marked as a Post Script activity.

Figure 21 : A message stating that the Post Script activity is successfully added
To manage your Post Script activities, navigate through Post Script Activities -> Manage Activities menu sequence. Figure 22 then appears.

Figure 22 : Manage a Post Script Activity
By default, Always option will be chosen from the Run Condition list indicating that the Post script activity will run irrespective of whether the script succeeds or fails. Choosing the ScriptFailed option will ensure that the Post script activity runs only when the script fails. Similarly, choosing the ScriptSucceed option ensures that the Post script activity runs only when the script executes successfully.
Click the Update button if you have made any changes to the Post script activity. You can even playback the recorded script to check if the Post script activity is perfectly recorded.
Similar to a normal activity, the following activities can be performed on a Post script activity too (see Figure 23).
-
Edit the Activity
-
Move the Post script activity up/down
-
Copy/Paste the Post script activity above or below a chosen Post script activity
-
Delete the Post script activity
-
Enable/Disable the Post script activity. For this you need to choose the Enable or Disable option by expanding the Options menu in Figure 23.

Figure 23 : Activities that can be performed on a Post script activity
-
By default, there are certain pre-built settings for the Web App Simulation Recorder. To access these settings, navigate through the Settings -> Recorder Settings menu sequence in the Web App Simulation Recorder. Figure 24 then appears.

Figure 24 : The default settings available in the Web App Simulation Recorder
-
The settings mentioned in Figure 24 are explained below:
- Maximum wait time to perform an activity (Secs): By default, the transactions recorded in the script are replayed in sequence. In the process, during playback or simulation, the maximum wait time to perform an activity in a transaction is set to 30 seconds. This implies that the script will wait for the transaction activity to complete within 30 seconds beyond which will exit the simulation. If you prefer to set the value for this parameter, you can override the default value.
- Default wait time to perform each activity (Secs): By default, the transactions recorded in the script are replayed in sequence. In the process, during playback or simulation, administrators may want to introduce a time delay before each activity in a transaction is performed. This is because, administrators wanted the simulation to be simulated just like how it was recorded by the user. To this effect, administrators can set a value of their choice against this parameter. The default value is set to 0.
- Number of playbacks: In order to verify the transactions recorded in the script are replayed in sequence without technical glitch, administrators should playback the recorded script multiple times. To automatically playback the recorded script without manual intervention, administrators can set a specific value against this parameter. For example, setting the value of this parameter to 2 will automatically replay the recorded script twice. By default, this value is set to 1.
- Playback interval (Secs): By default, this parameter is set to 10 seconds indicating that during consecutive playbacks of the recorded script, there will be a time delay of 10 seconds after a playback is complete and before the next playback commences. If you prefer to set the value for this parameter, you can override the default value.
- Allow browser to ignore certificate errors: In some environments, transactions recorded in a script may span across multiple web pages. Sometimes, administrators may be unaware of the fact that the SSL certificate of a web page had expired. The lack of SSL certificate for a web page will lead to the failure of the web app simulation in real-time. If administrators want the simulation to succeed irrespective of a web page possessing valid SSL certificate, then, he/she can do so by setting this flag to Yes. By default, this flag is set to No.
- Allow browser to load default user profile settings: By default, the web app simulation will not load the default browser settings (such as Single Sign-On, Cookies, Bookmarks, History etc) specific to the profile of the user performing the simulation. However, in some environments where Single Sign-On capability is enabled for the user performing the simulation, the simulation may fail after the first attempt. This is because, the login page will not appear during consecutive simulations. To ensure that the simulation succeeds in environments where default browser settings are specific to the user, set this flag to Yes. By default, this flag is set to No.
- User Agent: A User-Agent in HTTP headers refers to a string of text that web browsers and other applications send to web servers to identify themselves. Administrators may want to distinguish real time web requests from simulated web requests for web analytics, and other purposes. For this, you can specify a custom User-Agent that will be embedded in the Request Header when a simulation runs. By default, eG-Synthetic is displayed in the User Agent text box.
- Log level: By default, INFO is chosen from this list. This indicates that whenever the simulation is performed, information level logs are logged for further processing. You can choose to disable the logging activity by selecting the OFF option. You can also enable debug mode by choosing the DEBUG option. If you choose WARNING or ERROR options, the warning messages and error messages (respective to the option chosen) will be logged.
- Clicking the Reset option will set the default values to the fields mentioned above.
- Clicking the Update button will effect the changes made. Clicking the Cancel button will cancel the changes made, if any.
-
Once you have performed all the transactions, export the recorded transactions as a script to the eG manager. To do this, click the Export To eG Manager option that appears when you click the File menu in the Web App Simulation Recorder (see Figure 25).

Figure 25 : Choosing the Export To eG Manager option for exporting the script
-
In Figure 26 that appears, specify the following:

Figure 26 : Specifying the credentials to export the script
- Specify the name of the script in the Script Name text box.
- Specify the IP address or the host name of the eG manager against the IP/Host Name text box.
- Against the User Name (Script Owner) and Password text boxes, specify the credentials of the user who is authorized to export the script and initiate the simulation process.
- If the eG manager is SSL-enabled, then set the Protocol flag to HTTPS. If the eG manager is not SSL-enabled, then set the flag to HTTP.
- Specify the port at which the eG manager listens to against the Port text box.
-
Alternately, if you wish to export the script via a proxy server to the eG manager, select the check box against the Proxy Settings.
- Specify the IP address or the host name of the proxy server against the IP/Host Name text box.
- Specify the port through which the communication to the proxy server is established against the Port text box.
-
If the proxy server requires to be authenticated by a user for connecting to the eG manager, then select the check box against the Proxy requires user authentication check box.
- Specify the credentials of the user who is authorized to access the proxy server against the User name and Password text boxes.
- If you wish to store the credentials that you have provided for future use, then select the Remember Me check box.
- Once you have provided all the required credentials, click the Export button.
- If you wish to abort the operation click the Cancel button.
- If you wish to reset the credentials that you have entered, then, click the Reset button.
-
Once the script is exported successfully, a message to that effect will appear as shown in Figure 27.
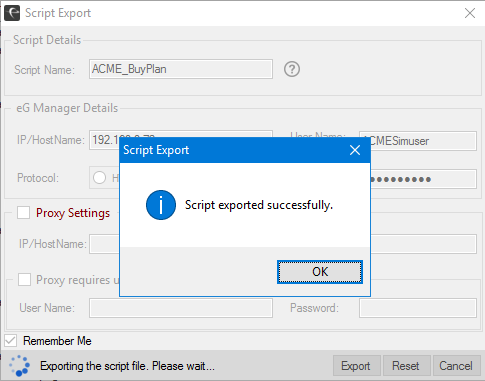
Figure 27 : Message that appears when the script is exported successfully
-
If you want to add/modify/delete a transaction in an exported script, eG Enterprise provides an option to import the exported script. For this, click the Import from eG Manager option that is available in the File menu (see Figure 25).
-
Figure 28 then appears. Specify the following in Figure 28.

Figure 28 : Specifying the credentials to import the script from eG manager
- Specify the IP address or the host name of the eG manager against the IP/Host Name text box.
- Against the User Name (Script Owner) and Password text boxes, specify the credentials of the user who is authorized to export the script and initiate the simulation process.
- If the eG manager is SSL-enabled, then set the Protocol flag to HTTPS. If the eG manager is not SSL-enabled, then set the flag to HTTP.
- Specify the port at which the eG manager listens to against the Port text box.
-
Alternately, if you wish to import the script via a proxy server from the eG manager, select the check box against the Proxy Settings.
- Specify the IP address or the host name of the proxy server against the IP/Host Name text box.
- Specify the port through which the communication to the proxy server is established against the Port text box.
-
If the proxy server requires to be authenticated by a user for establishing a connection between the eG manager and the machine on which you wish to import the script, then, select the check box against the Proxy requires user authentication check box.
- Specify the credentials of the user who is authorized to access the proxy server against the User Name and Password text boxes.
- If you wish to save the credentials for future use, then select the Remember Me check box.
- Once you have provided the above-mentioned credentials, click the Connect button in Figure 28.
-
Clicking the Connect button in Figure 28 will enable and populate the Script Name list as shown in Figure 29. Choose a script from this list and click the Import button.

Figure 29 : Choosing the script that you wish to import from the eG manager
- If you wish to abort the operation click the Cancel button.
- If you wish to reset the credentials that you have entered, then, click the Reset button.
-
By default, the recorded scripts are stored in <eG_INSTALL_DIR>/manager/config/SyntheticScripts<user or script owner> folder. In SaaS/MSP deployments, users may not have access to this folder. Sometimes, scripts occupy considerable amount of space and hence users may want to delete unused scripts. To enable users delete such unused scripts, you can select the script to be deleted from the Script Name list and click the Delete Script button in Figure 29. Figure 30 then appears displaying that the script was deleted successfully.

Figure 30 : Message that appears after a script is deleted
Note:
- In a redundant manager setup, note that the scripts can be deleted from the Primary manager only. The script will be automatically deleted from the Secondary manager once it is operational.
- Users are allowed to delete those scripts that are not used by any Web App Simulation component.
- Once the import is successful, the script will automatically open in the Web App Simulation Recorder.
-
In case you have recorded only a partial script and wish to save the script in the local machine, then, you can click the Save As option available in the File menu of the Web App Simulation Recorder.
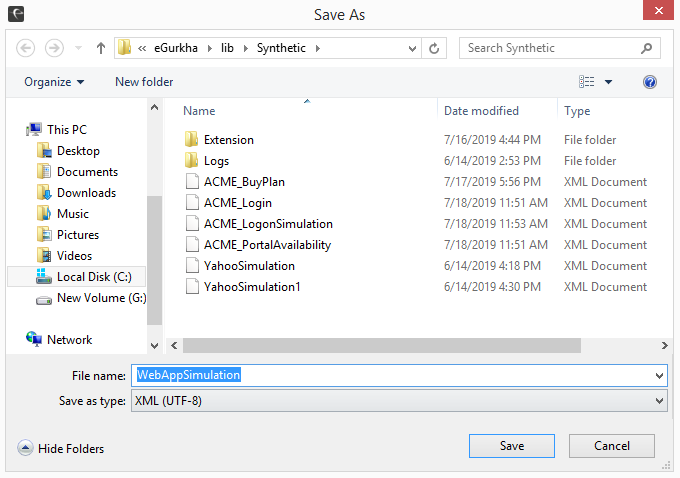
- Figure 31 will then appear prompting you to locally save the script. By default, you will be prompted to save the script with a default File name. You can either carry on with that default file name or specify a new file name for the script. By default, the script will be saved in .xml format.
