Setting up Zoom API
Zoom APIs enable developers to request information from Zoom, including (but not limited) user details, meeting reports, dashboard data, as well as perform actions on the Zoom developer platform on a user's behalf. For example, you can create a new user or delete a user's meeting recordings.
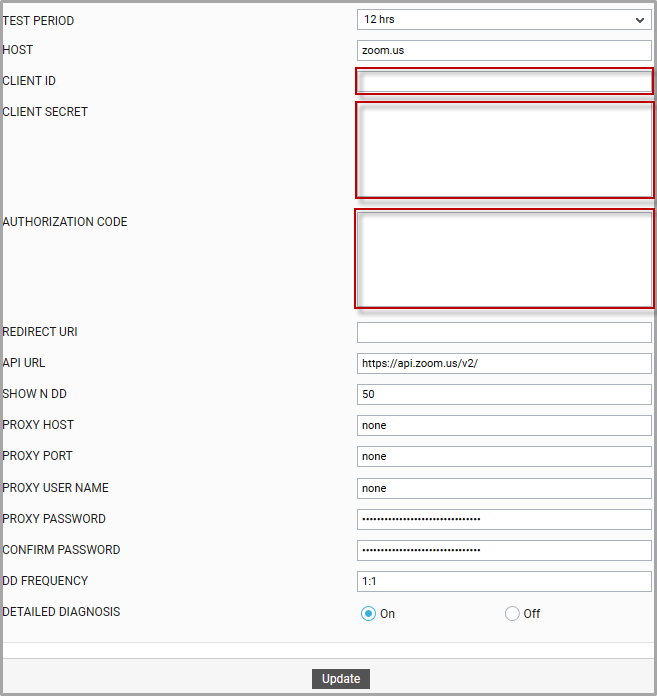
To use Zoom APIs and pull performance information, the eG agent should access the API URL as an authenticated Zoom OAuth app, For this purpose, you need to first create a special OAuth app,on Zoom for monitoring purposes, and obtain the authentication and authorization details of the app: Such details include:
-
Client ID: Client ID is the unique identifier of the special monitoring app you create
-
Client Secret: Unique string for the client which acts like a password.
-
Authorization Code: Every program which tries to access Zoom is considered an app. In this case the monitoring app needs to be authorized by Zoom, so it needs a authorization code generated by Zoom.
-
Redirect URL: A redirect URL is the URL that Zoom calls once the monitoring app has been successfully authorized and granted an authorization code
Follow the steps below to create a new OAuth app obtain the aforesaid details:
-
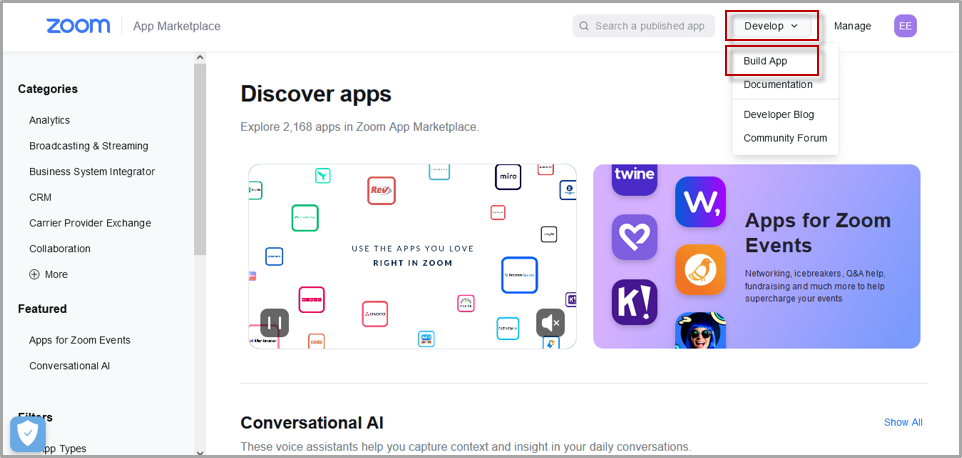
Go to Zoom Marketplace (http://marketplace.zoom.us). Login with Zoom admin credentials, and click on Develop -> Build App from the menu as shown in Figure 1
-
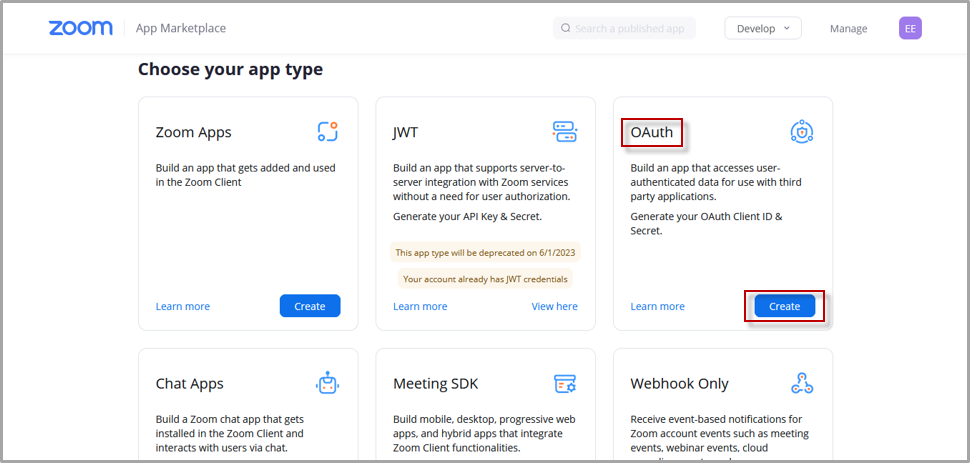
Choose the app type as OAuth and click create as shown in Figure 2
-
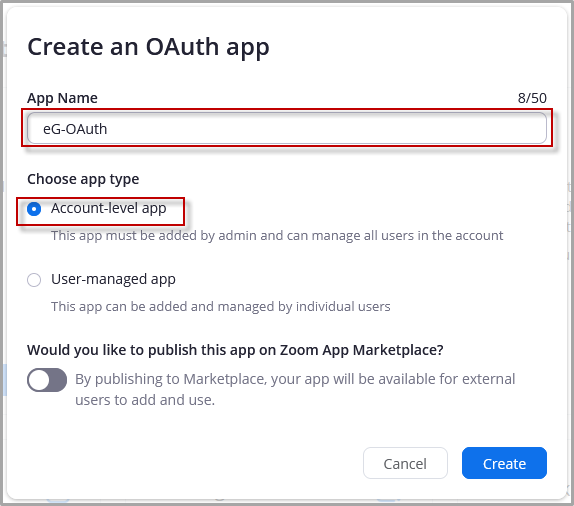
In the next screen, enter the app name of your choice, in the app type, select 'Account-level-app', disable the option to publish the app and click create. This is shown in Figure 3.
-
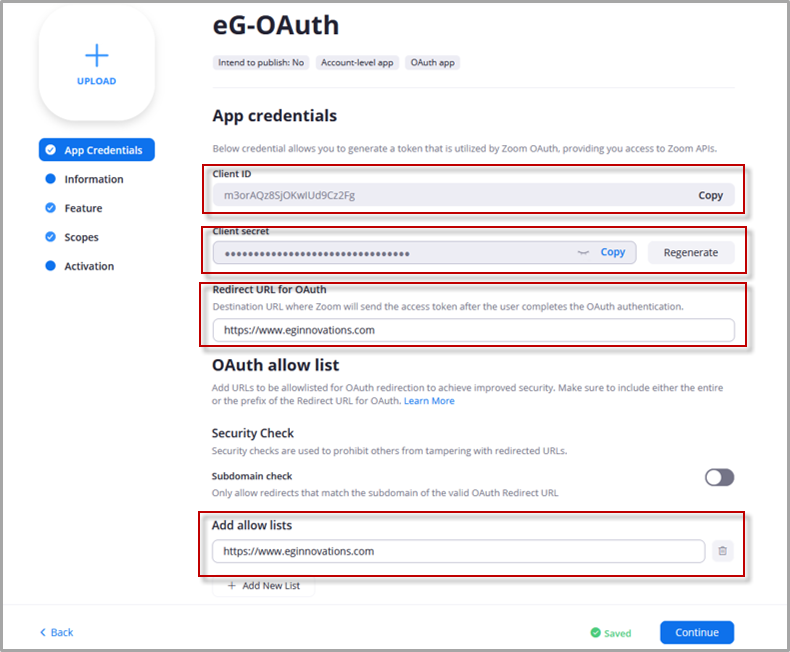
From the next screen, copy 'Client Id' and 'Client Secret', also enter the rediect url as shown in Figure 4.
-
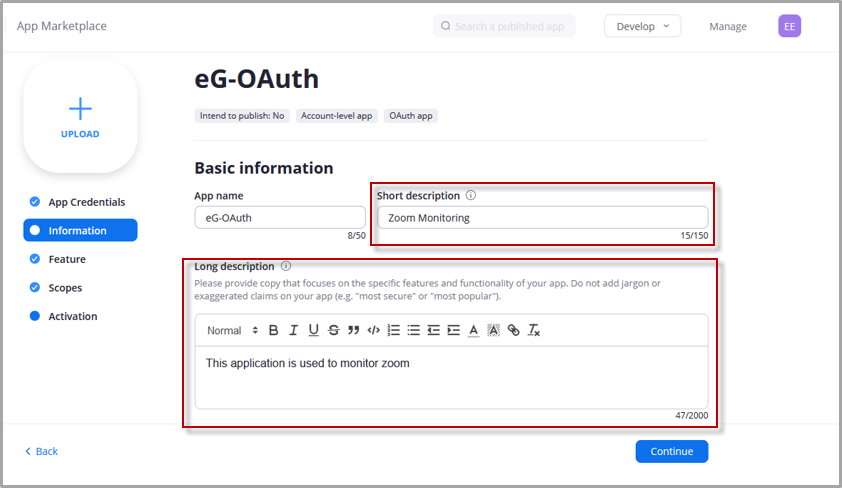
In the next screen, enter short description and long description for the app as shown in Figure 5
-
Enter other details as shown in subsequent screens and click continue after each step.
-
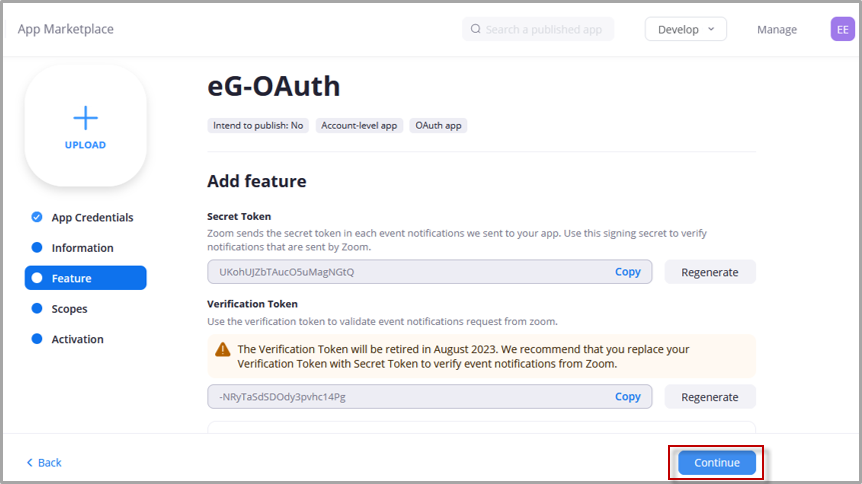
Copy the Secret Token and Verification Token from next screen as shown in Figure 6 and click continue.
-
Click Add Scopes button on next screen and various options from each category which we monitor and click Continue. This is shown in Figure 7-15.
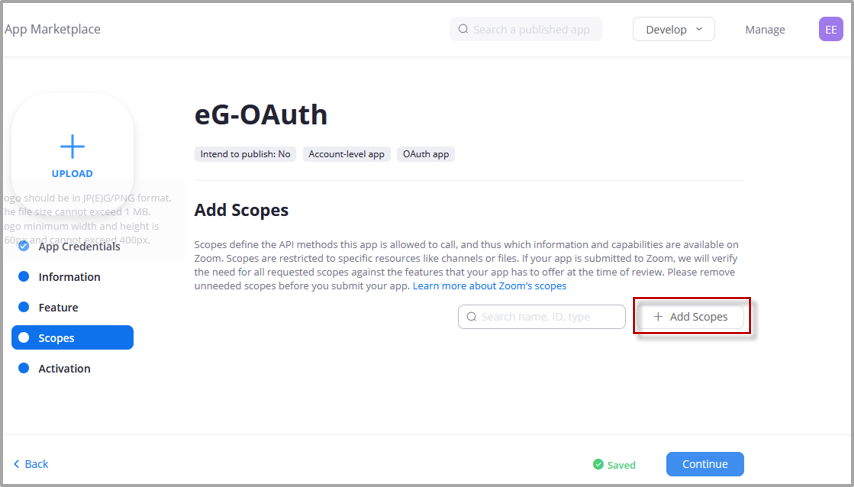
Figure 7 : Adding new scope for monitoring
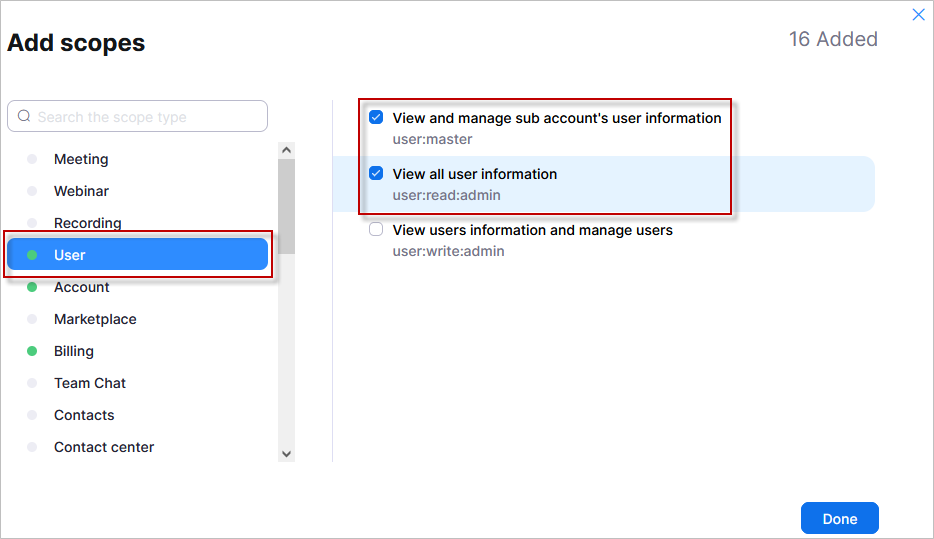
Figure 8 : Adding user information in monitoring scope
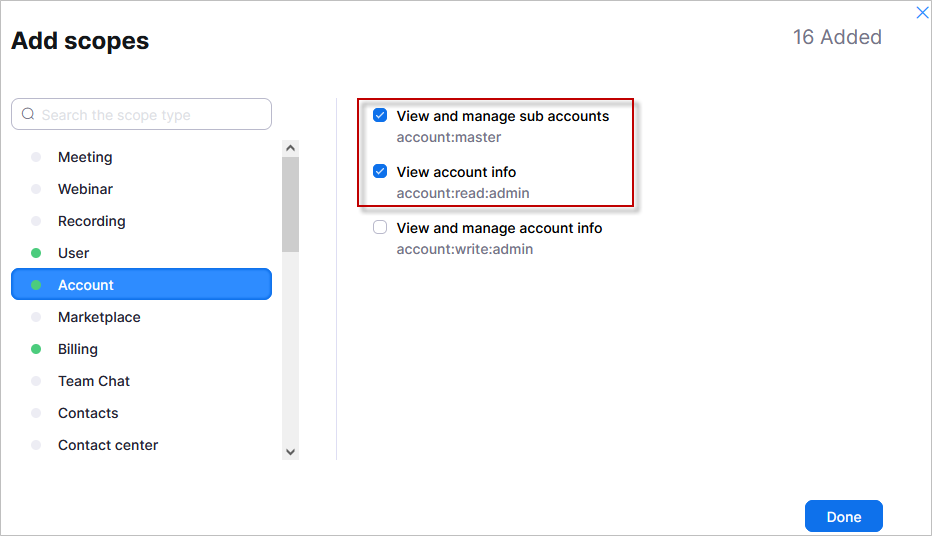
Figure 9 : Adding account information in monitoring scope
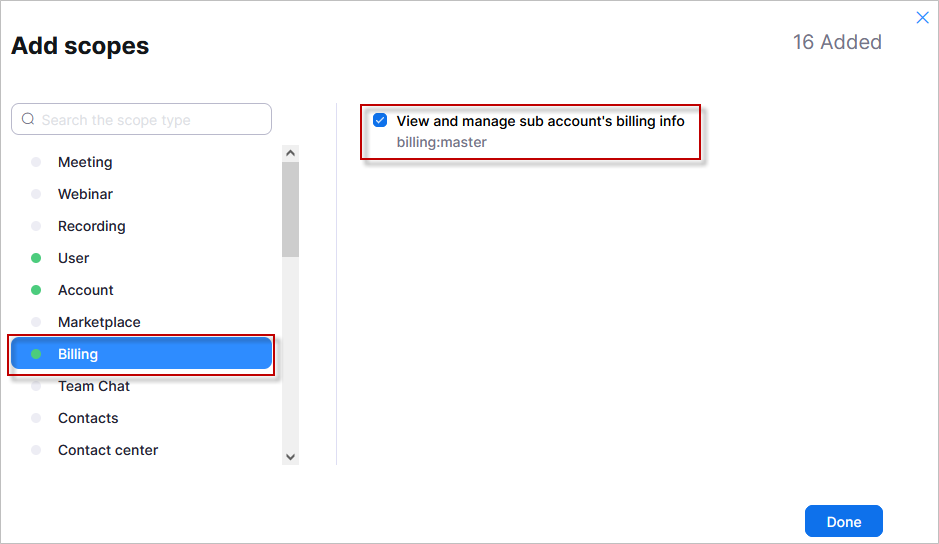
Figure 10 : Adding billing information in monitoring scope
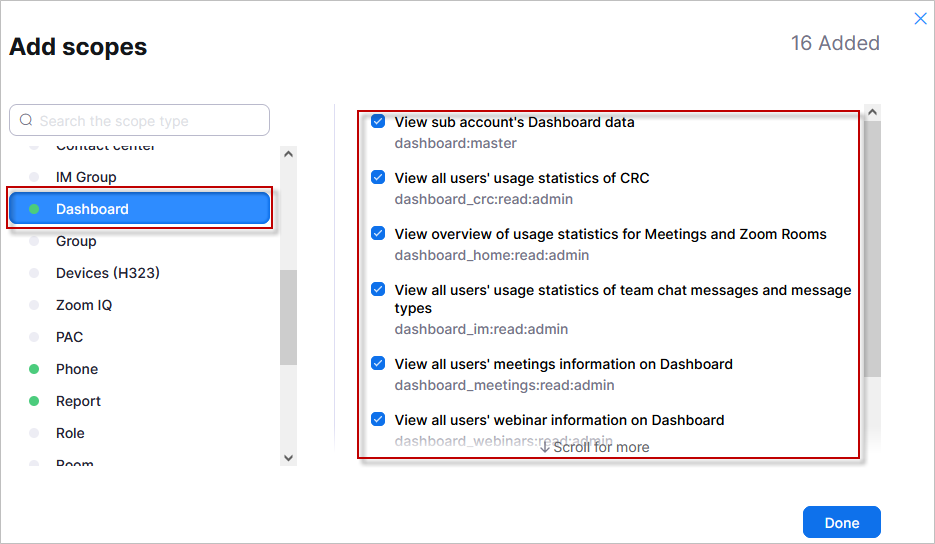
Figure 11 : Adding dashboard information in monitoring scope
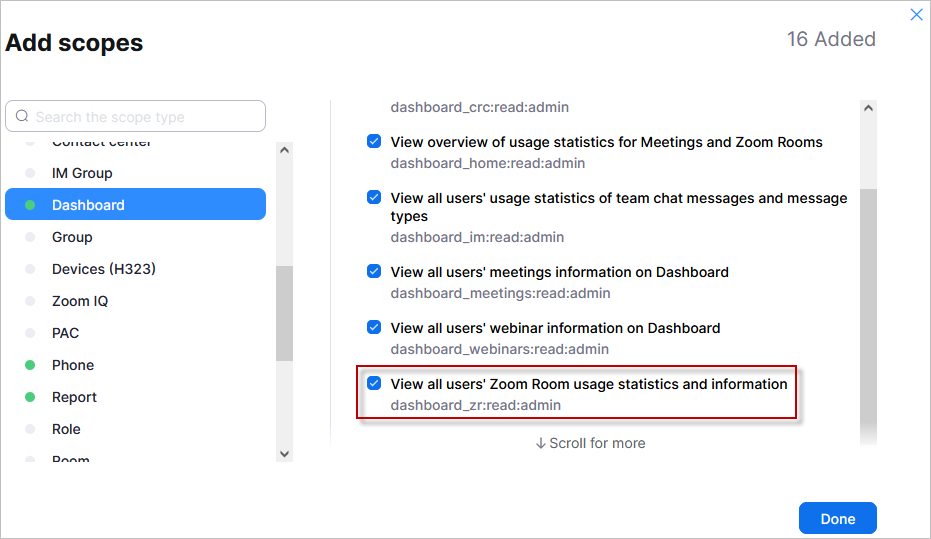
Figure 12 : Adding dashboard information in monitoring scope
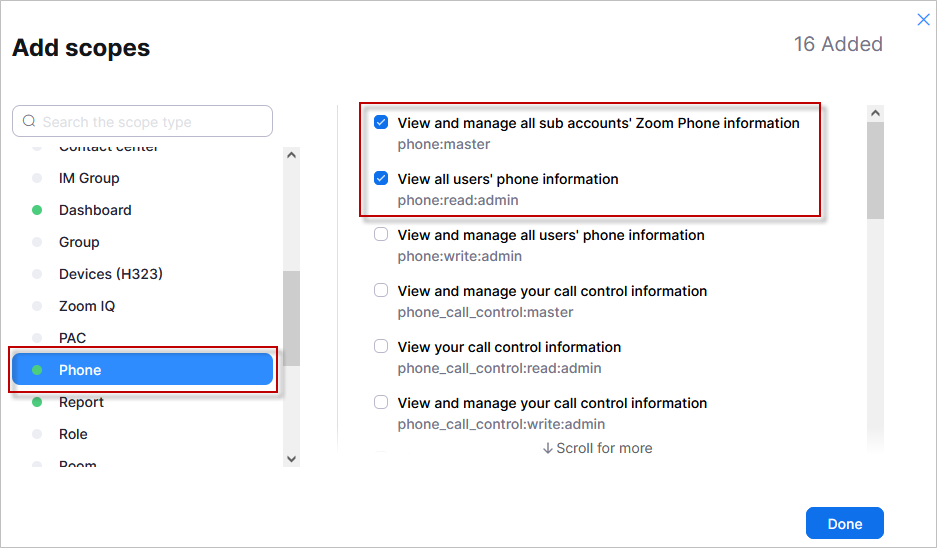
Figure 13 : Adding phone information in monitoring scope
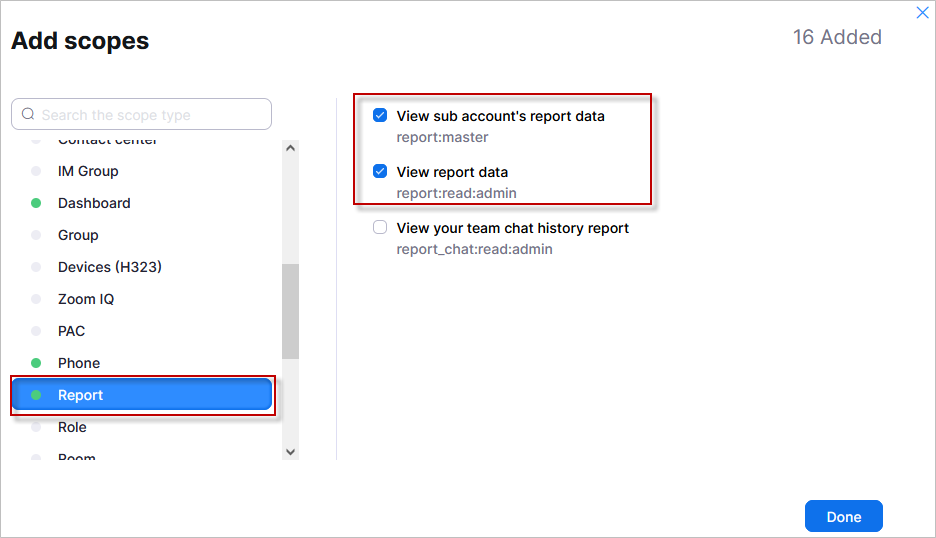
Figure 14 : Adding dashboard information in monitoring scope
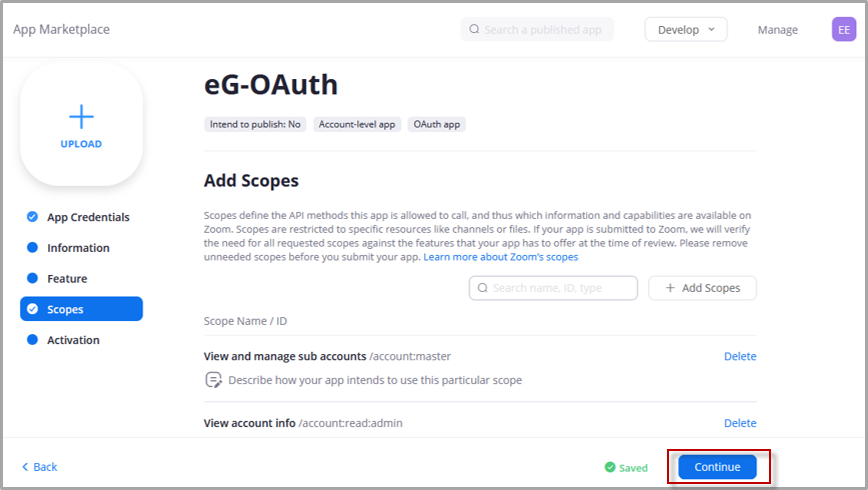
Figure 15 : Completing the scopes setup
-
In the Activation Section, Add your app as shown in Figure 16 and 17, and click Allow.
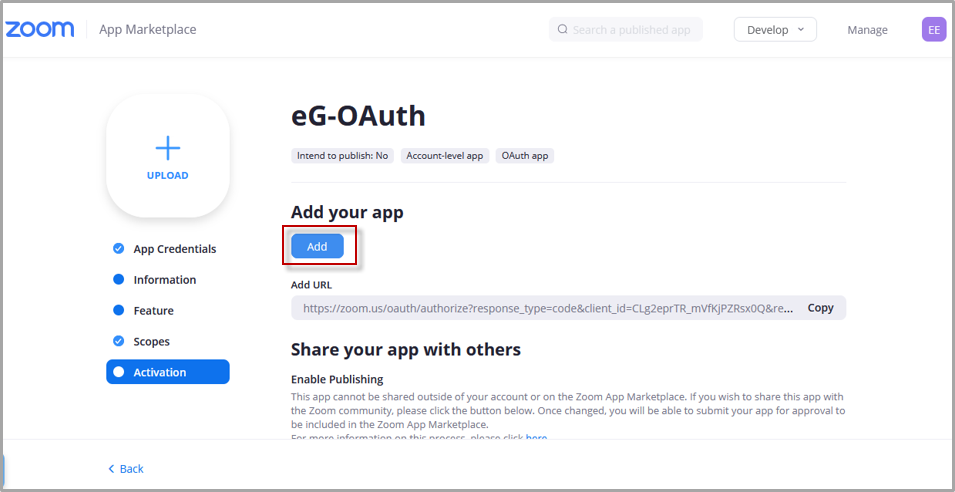
Figure 16 : Add your app for activation
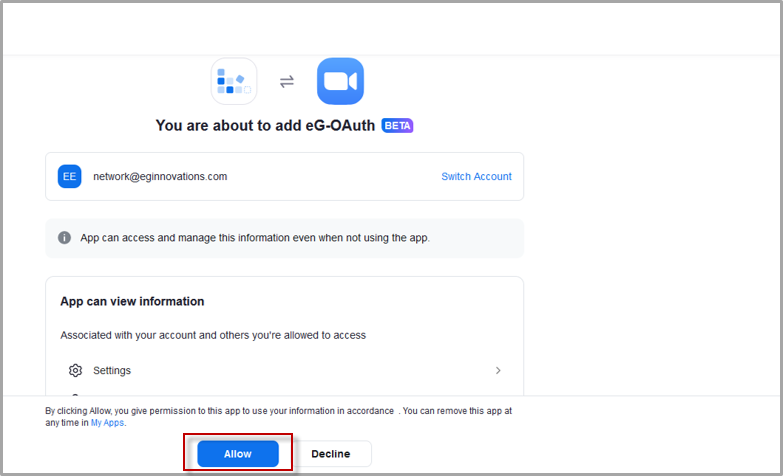
Figure 17 : Adding the app
-
It will be redirected to redirected URL, copy the authorization code as shown in Figure 18.
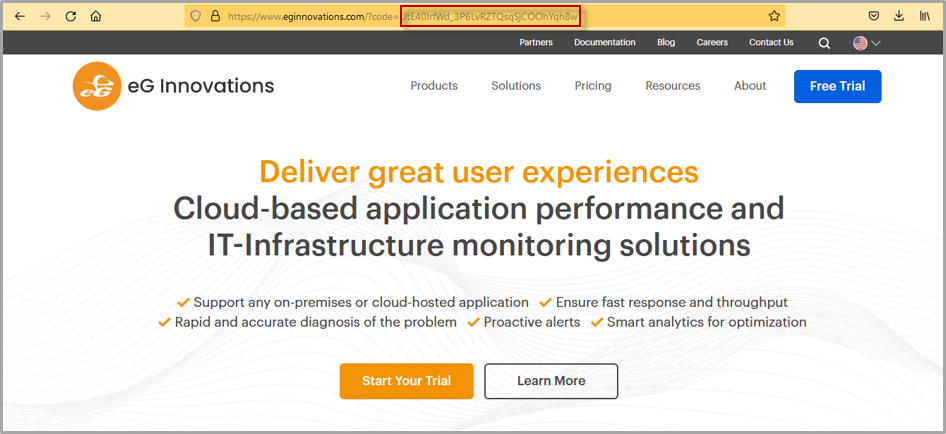
Figure 18 : Landing on redirected url
-
You can use the Client Id, Client Secret, Authorization Code and redirect URL as shown in the Figure 19 when configuring API based tests.
