
Troubleshooting the Failure of the eG Agent
If the eG agent fails to start or collect metrics, first check the opt/egurkha/agent/logs/error_log file to find out the reasons for the failure. To trigger error logging, you can do either of the following:
-
Restart the eG agent in the debug mode to automatically trigger error logging; (OR)
-
Edit the eG agent's start-up script to manually enable error logging
Both these approaches have been discussed here.
Automatically Enabling Error Logging
For this, follow the steps below:
-
Check if you are logged into the target host as the eG install user.
-
If so, proceed to stop the eG agent by running the command /opt/egurkha/bin/stop_agent.
-
Now, restart the eG agent in the debug mode using the command /opt/egurkha/bin/start_agent_debug . Doing so will automatically create the following log files in the /opt/egurkha/agent/logs directory:
- The agentout.log file, which records details of the tests run and measures reported by the agent to the manager
- The agenterr.log and error_log files to which the runtime errors encountered by the eG agent are logged
Manually Enabling Error Logging
If you do not want to restart the eG agent in the debug mode, then you have to manually edit the eG agent startup script to enable logging.
To achieve this, follow the steps below in Linux, AIX, and HP-UX environments.:
- Open the start_agent file in the /opt/egurkha/bin directory.
-
Edit the line that begins with nohup /opt/egurkha/jre/bin/java–Xrs EgMainAgent . . . (see Figure 1).
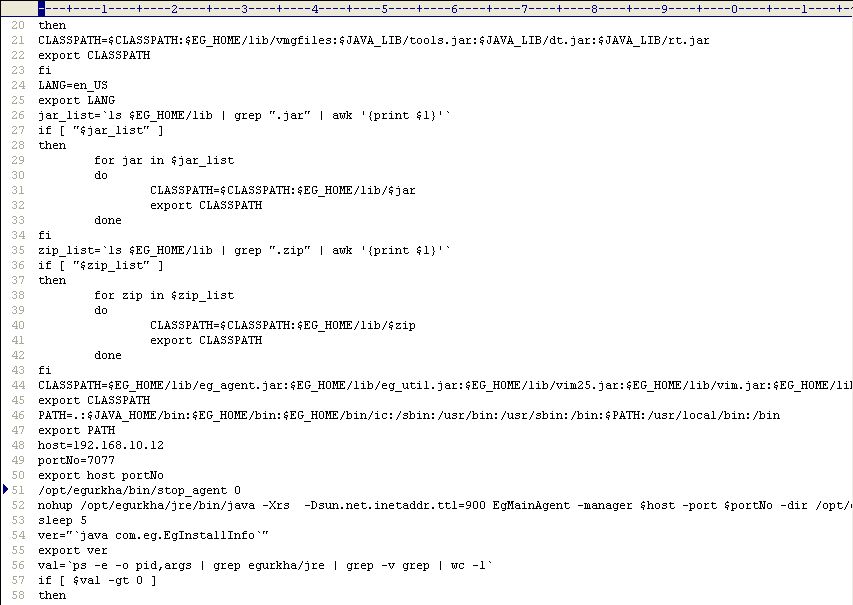
- At the end of the line indicated by Figure 1, you can find an entry that reads as follows: . . . /dev/null 2>/dev/null.
- This entry is appended to the nohup /opt/egurkha/jre/bin/java line by default, and indicates that both output and error logging is not enabled for the eG agent in question, by default.
-
To enable output logging, replace the first occurrence of /dev/null in the line with the full path to an output log file (see Figure 2). Similarly, to enable error logging, replace the second occurrence of /dev/null with the full path to the error log file (see Figure 2).
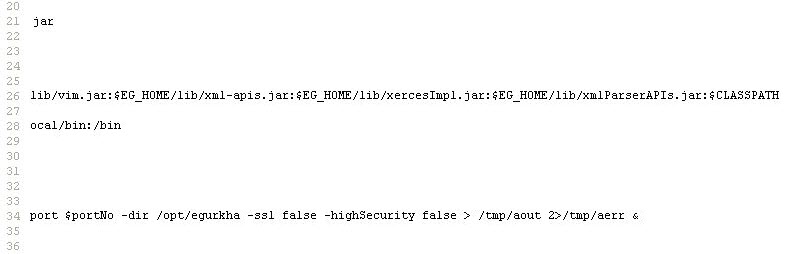
- Finally, save the start_agent script.
- Restart the agent.
In Solaris environments, error and output logging for the eG agent can be triggered by editing the starta script in the /opt/egurkha/bin directory. The steps involved in this process are discussed hereunder:
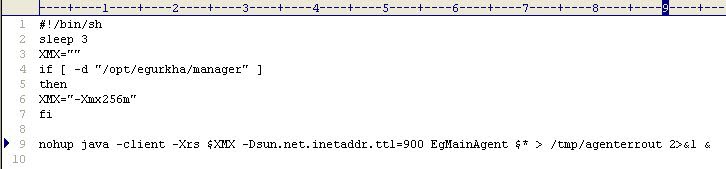
- Open the starta file.
-
Edit the line that begins with nohup java –client -Xrs . . . (see Figure 3).

- At the end of the line indicated by Figure 3, you can find an entry that reads as follows: . . . /dev/null 2>&1.
- This entry is appended to the nohup java line by default, and indicates that both output and error logging is not enabled for the eG agent in question, by default.
-
Unlike Linux, HPUX, and AIX agents, which can be configured with two separate log files for error and output logging respectively, the agent on Solaris can only be configured with a single log file;both errors and output will be captured by this log file only. Therefore, to enable error and output logging, replace the /dev/null entry in the nohup line with the full path to the log file (see Figure 4).
- Finally, save the starta script.
- Restart the agent.
