Generating API Token and Webhook URL for Integrating eG Enterprise with Slack
The primary pre-requisite for integrating eG Enterprise with Slack is to create a dedicated channel in Slack where the eG alerts should be sent. Once this is done, then you should proceed to do the following:
-
Generate an API token and an incoming Webhook URL in Slack for the eG manager to use;
-
Configure the eG manager with the channel name, API token, and Webhook URL
The procedure below describes how to generate the API token and Webhook URL in Slack.
-
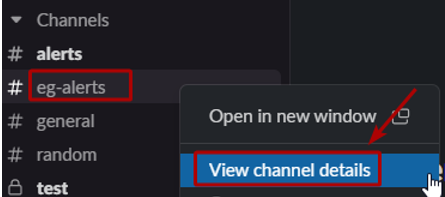
Login to Slack, and expand the Channels node in the tree-structure. All existing channels will be listed as the sub-nodes. Here, look for the special channel you created for the purpose of integrating with eG Enterprise. Once you find it, right-click on it, and select the View channel details option from the menu that pops up (see Figure 1).
-
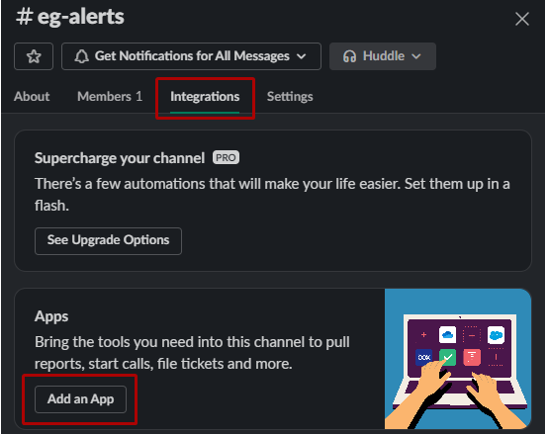
Figure 2 will then appear. Click on the Integration tab page in Figure 2, and then, click on the Add an App button therein. The App will enable you to consolidate and file tickets that are auto-generated by Slack against alerts sent into the chosen channel.
-
This will open Figure 3. The first step for adding an App to a channel is to create a bot. For that, in the Search text box in Figure 3, type 'bot'. The option named Bots will then appear in the result set. To install a bot, click on the Install button against Bots.

-
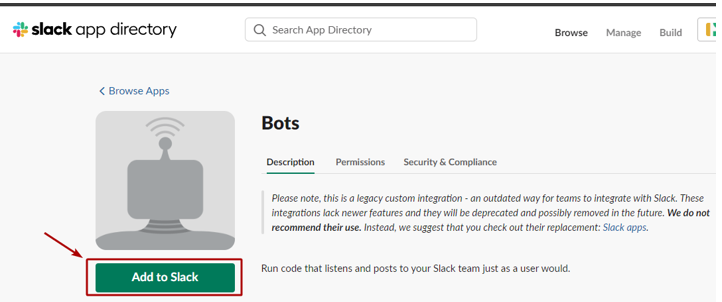
When Figure 4 appears, click on the Add to Slack button therein to add the Bot being installed to the Slack app directory.
-
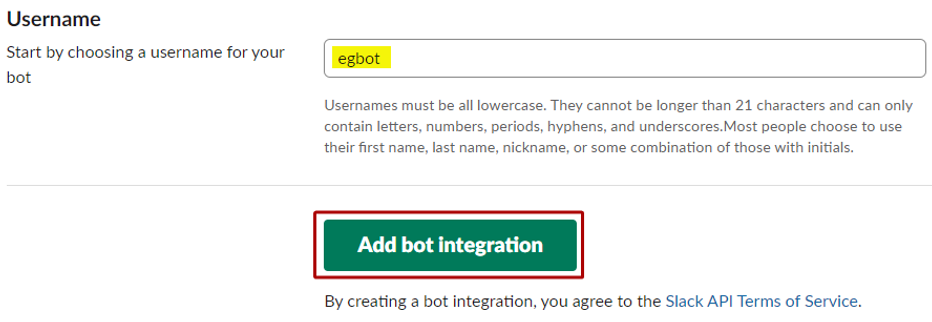
This will invoke Figure 5. Assign a unique Username to your Bot and click on the Add bot integration button to proceed (see Figure 5).
-
Figure 6 then appears displaying the API Token of the bot. Make a note of that token. Then, click on the Save Integration button (not shown in Figure 6) at the bottom of the Integration Settings page to save the bot integration.

-
Now, return to Slack, right-click on the bot you just created, and choose the View app details option (see Figure 7).
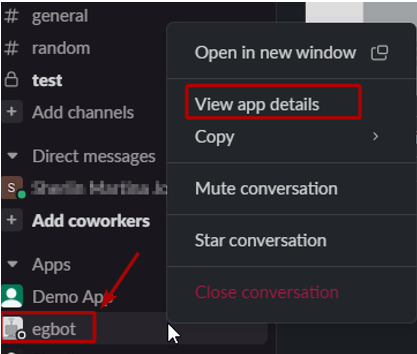
Figure 7 : Selecting the View app details option for the bot
-
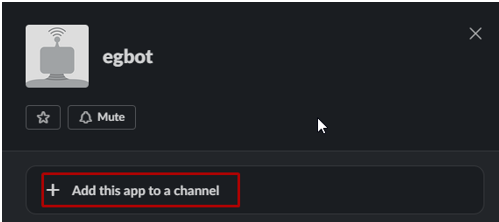
When Figure 8 appears, click on the Add this app to a channel option therein.
-
Figure 9 will then appear. From the drop-down list in Figure 9, select the dedicated channel you created for receiving eG alerts. Then, click the Add button to add the chosen bot to the selected channel.
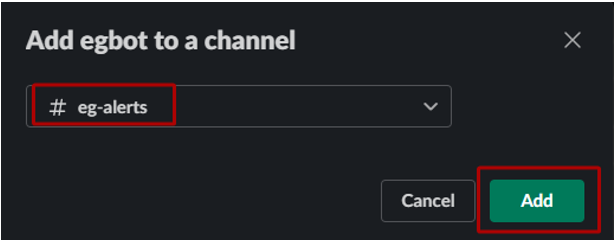
Figure 9 : Adding the bot to the dedicated channel created for eG alerts
-
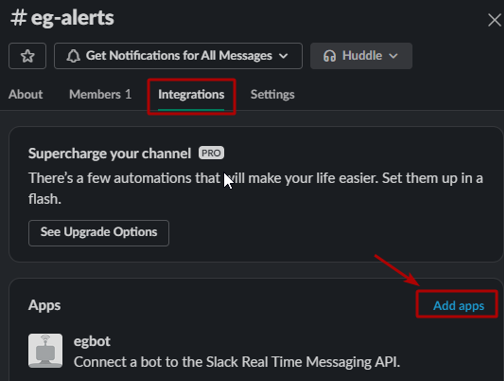
This will open Figure 10. Select the Integrations tab page in Figure 10, and click on the Add apps option.
-
Figure 11 will then appear. Search for the string 'incoming webhook' using the Search text box in Figure 11. Then, click on the Incoming WebHooks option that will appear in the search results.
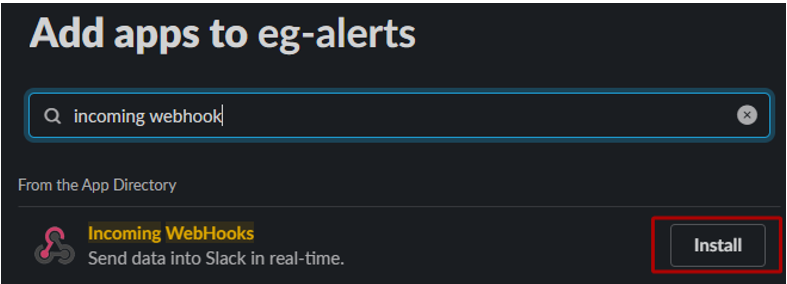
Figure 11 : Choosing to add Incoming WebHooks to the eG channel
-
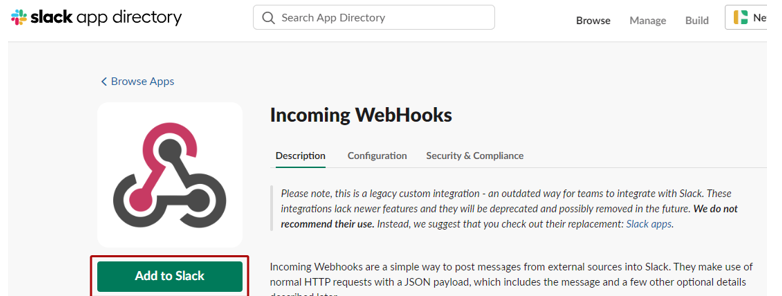
This will invoke Figure 12. Click on the Add to Slack button in Figure 12 to add incoming webhooks to the Slack app directory.
-
Figure 13 will then appear. From the Post to Channel drop-down in Figure 13, select the channel to which the new Incoming Webhook should post messages. This should be the dedicated channel you created for receiving eG alerts. After selecting the channel, click the Add Incoming WebHooks Integration button in Figure 13.

Figure 13 : Selecting the channel to which the Incoming WebHook should post messages
-
Figure 14 will then appear displaying the Webhook URL. Make a note of this URL.

For the integration to work seamlessly, make sure you configure eG Enterprise with the dedicated Channel you created for the purpose of the integration, the API Token that was generated at step 6 above, and the Webhook URL that was generated at step 14 of the aforesaid procedure.


